• FREE Printables
  • Shopping & Gift Guides
  • Privacy Policy & Disclosure
  • Media Kit
  • Advertise/PR
  • Contact Me!
    • Facebook
    • Instagram
    • Pinterest

The Everyday Home

  • My Home Tours
  • Flip House Tours
  • DIY
  • Crafts
  • Recipes
  • Health/Beauty
  • Essential Oils
  • Cleaning/Organizing
  • Travel

By Barb 22 Comments

Sharpie Markers

Filed Under: Uncategorized

Pin4
Share8
Tweet
Share
12 Shares
Sharpie, Marker, Lettered Dishes, Numbered Dishes, Custom Dishes
Have you ever wondered why manufacturers  give products the names that they choose?

I mean, when you look at this seemingly normal marker, do you instantly think “something harmful which can cut you and cause serious ouchies?”

A sharpie?

Why not a markie?

A writie?

A Create-your-own-customized-dishes-ie?

Sharpie, Marker, Lettered Dishes, Numbered Dishes, Custom Dishes

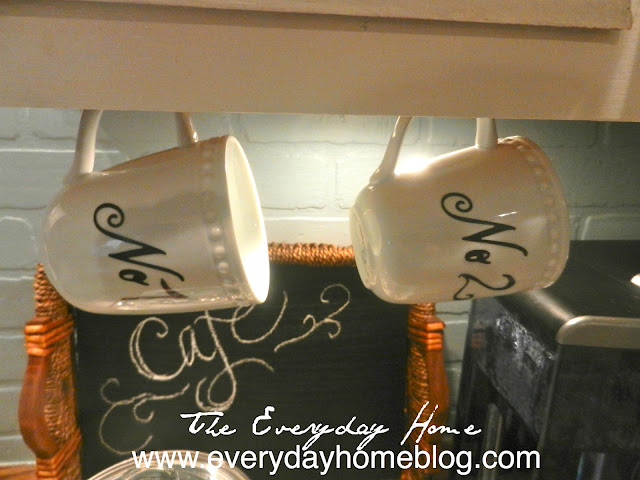
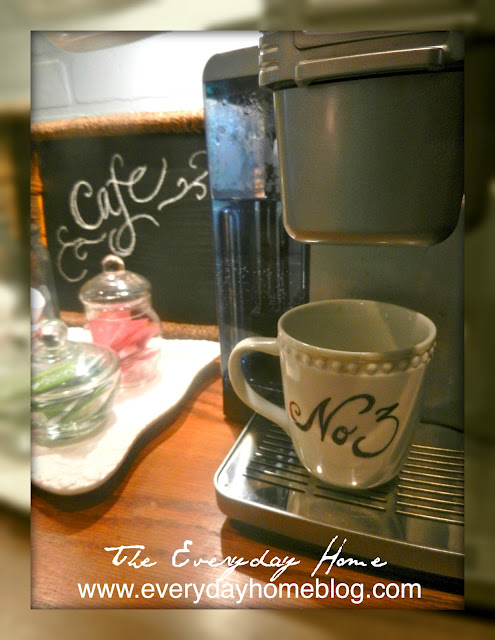
I mean, surely when they made these little writing utensils… they had to know that they would be used to create numbered coffee cups.

Sharpie, Marker, Lettered Dishes, Numbered Dishes, Custom Dishes

If the makers of the Sharpie were so, well….”sharp” – they would sell a little 
“Coffee Cup Making Kit” that featured a thin marker and some of these…


… cute little packs of scrap booking stickers.

Here is what their Instructions could read, were they to sell these “Coffee Cup Making Kits.”

1) Go to Dollar Tree and buy cheap inexpensive coffee cups.

2) Take cups home, and tryout your new French roast coffee and chocolate-covered Biscotti which happened to find its way into your cart at Dollar Tree.


3) Stick chosen letters onto cup.  Get a little aggravated that the sticker package you bought doesn’t contain numbers.  Call Martha Stewart a “wirty-dord.” 

4) Eat another biscotti.

5) Decide that you can wing it with the numbers.

6) Using a very tiny tip Sharpie, trace around the sticker.  

7) Wipe biscotti chocolate off side of cup.

8) Remove sticker carefully, then color in the letters.

9) Practice the numbers nine times on a piece of paper before feeling comfortable about writing it on the cup.

10) Feel remorse for drinking second cup of French Roast and wishing you had a steadier hand.

11) Freehand the number once twice until you are satisfied with the look.

12) Place in 350 degree oven for 30 minutes.

Enjoy your baked cups.  

Yep, that is exactly how the instructions would read.

I just know the Sharpie Marker Makers knew we Bloggers and DIY’ers would find random uses for their markers, so I am sure that is why they also created pretty, metallic colors.


I am 100% sure they knew I would want to write “Autumn Blessings” on the tops of more Dollar Tree cups.


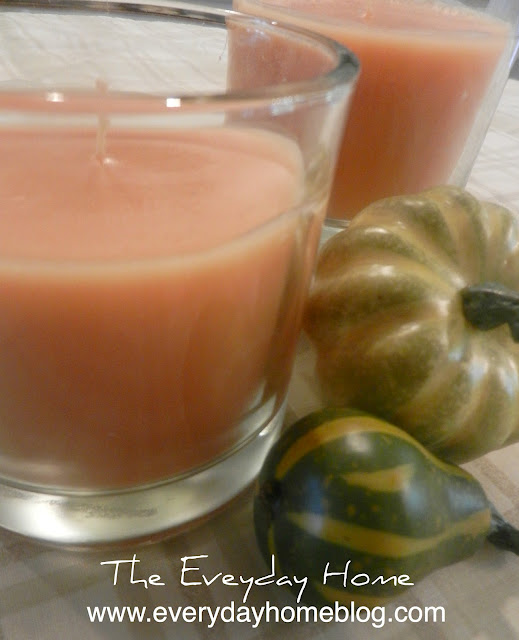
Or, that I would want to take cheap inexpensive, plain candles –

Sharpie, Marker, Lettered Dishes, Numbered Dishes, Custom Dishes


Sharpie, Marker, Lettered Dishes, Numbered Dishes, Custom Dishes

– and write a quote about Autumn by Emily Bronte to create script candles.

Sharpie, Marker, Lettered Dishes, Numbered Dishes, Custom Dishes


So, while I have nooooo earthly idea why they named this versatile little writing tool a “Sharpie”-
I am so happy they not name it a “Dull-ie” because 
we would have missed out on so many cute projects.  Don’tcha think?


XXOO


« Autumn Blessings
Yooohooo! Giveaway! »

Comments

  1. Ceekay-THINKIN of HOME/Doublewide Decor says

    September 24, 2012 at 11:46 PM

    CA-ute! I am so doing this…I saw the plates on another blog….
    But your tute is definately more life like…especially the chocolate smudge on the cup…I mean, we must have ALL the steps!!

    View Comment
    Reply
  2. Kim @ Savvy Southern Style says

    September 24, 2012 at 11:47 PM

    I never knew you could write and bake it on. Cool idea. I wouldn’t write very well free hand though. It would look like a child did it.

    View Comment
    Reply
  3. Shenita @ Embellishments by SLR says

    September 25, 2012 at 1:10 AM

    Barb, these are too cute!! LOVE the mugs, especially! You are so crafty!!

    View Comment
    Reply
  4. Jane@Cottage at the Crossroads says

    September 25, 2012 at 1:14 AM

    Barb, I can’t wait to try this. And I must say that you have a beautiful script!

    View Comment
    Reply
  5. fixitfaerie says

    September 25, 2012 at 1:30 AM

    I wondered where you got these. I need to go to the store and get some. They look great.

    View Comment
    Reply
  6. Allcityloan says

    September 25, 2012 at 10:08 AM

    Wav Nice to see Most like the creativity…Installment loan

    View Comment
    Reply
  7. Allcityloan says

    September 25, 2012 at 10:10 AM

    Wav NIce to see the creativity ,,,, Installment loan

    View Comment
    Reply
  8. House on the Way says

    September 25, 2012 at 12:13 PM

    I love these! Great Idea! I’d like to invite you to share this post at my party, Twirl & take a Bow at http://www.houseontheway.com. They would make a great addition!
    Leslie
    houseontheway@gmail.com

    View Comment
    Reply
  9. Kathysue says

    September 25, 2012 at 1:09 PM

    Hi Barb!!
    I just posted this on my Great Idea Pinboard. I read this before, but not sure if I saved it. I love the way you described how to do it and great images!!
    xo Kathysue

    View Comment
    Reply
  10. Bliss says

    September 25, 2012 at 2:22 PM

    I wonder if there was a dessert you could of baked inside the cups as they cured. Make another set and try that.

    ~Bliss~

    View Comment
    Reply
  11. Erin Kaven says

    September 25, 2012 at 2:39 PM

    You are too blasted funny. If you were in FL or I was in NC (oh I wish) I would so hang with you!

    View Comment
    Reply
  12. thistlewoodfarm says

    September 25, 2012 at 4:16 PM

    Ummmmm….a wierdy dort? Seriously. That is the funniest thing I’ve heard in a long time!

    Have a great day rock star!
    karianne

    View Comment
    Reply
  13. Dee @ A Lapin Life says

    September 25, 2012 at 7:26 PM

    Very cute idea! I did not know you could bake it on.

    Dee

    View Comment
    Reply
  14. Shirley@Housepitality Designs says

    September 25, 2012 at 8:19 PM

    Love sharpies…saw plates done like the mugs…love the mugs with the inscriptions! Waay to cute!!!

    View Comment
    Reply
  15. Barbara Bussey {The Treasured Home} says

    September 26, 2012 at 3:45 AM

    Darn! These are cute! You did these all by yourself? YOU must be the Sharpie! (that was a good one, eh?)

    View Comment
    Reply
  16. Pat@Life At Lydias House says

    September 27, 2012 at 2:39 AM

    What a great tutorial! I can’t wait to try this. I wonder if it works with Sharpie paint markers too?

    View Comment
    Reply
  17. Designs By Pinky says

    September 27, 2012 at 2:47 AM

    This is BRILLIANT!!!!!!! I never knew you cold do this, how did you ever think of this????????? I am SO maing some dishes, mugs, candles……….oh Lord! Someone stop me:):) XO, Pinky

    View Comment
    Reply
  18. may lim says

    September 29, 2012 at 3:41 PM

    This is a very clever idea. I never thought you can do this. I’ll definitely try this one. Thanks!
    website hosting australia

    View Comment
    Reply
  19. Babs says

    October 3, 2012 at 7:56 PM

    Wow! Love your idea..and I had NO idea that Sharpies came in metallic colors. I’m headed to the store right now! Thanks for the tip…and I love your cups and candles.
    Babs

    View Comment
    Reply
  20. Peppermint_Patt says

    October 28, 2012 at 9:55 PM

    Hi Barb!
    Saw this on your Pinterest board and came to investigate.
    I love step-by-step tutorials, always guarantees success,
    that is,unless a step was left out. Joking.
    Neat idea for gifts when you go somewhere over the holidays
    where gifts are not expected or required, but a nice surprise.
    We have to get together for lunch since we live so close to
    each other! Glad the grip of “Sandy” has stayed off our coast,
    but praying for those up North who are preparing for her arrival.
    Loved the Southern Bloggers Convention and all of you who hosted
    are the “Rock Stars of the blogging world.” Working on my
    soon-to-be blog.

    View Comment
    Reply
    • Jacalyn says

      March 8, 2017 at 4:47 PM

      Posts like this brthgien up my day. Thanks for taking the time.

      View Comment
      Reply
  21. Christy says

    October 3, 2013 at 4:09 PM

    Another site said this could only be done with oil based Sharpies. Is this true? And can this technique be used on ceramic tile?

    View Comment
    Reply

Leave a Reply Cancel reply

Your email address will not be published. Required fields are marked *

Recipe Rating


Search All Posts

Hi There, I’m Barb

Hi Y'all! I can't tell you how happy I am that you stopped by here at The Everyday Home. I am so excited to share some of my favorite LIfestyle posts with you. So grab some sweet tea and sit a spell... READ MORE

View My Blog Posts

Writing WP Posts with Optimized SEO

Simplified SEO for Bloggers!

Does SEO totally confuse you? I have simplified basic SEO into 7-easy steps! Click the above image to purchase. Only $4.99

10 Fabulous Farmhouse Tables

10 Fabulous Farmhouse Tables

10 Ways to “Hotel-ify” Your Guest Room

10 Ways to “Hotel-ify” Your Guest Room

My MOST POPULAR Winter Project Ever!

My MOST POPULAR Winter Project Ever!

FREE Printable & 4 Winter Projects

FREE Printable & 4 Winter Projects

Must Have Winter Home Decor

Must Have Winter Home Decor

BEST EVER {Easy} Chunky Chicken Noodle Soup

BEST EVER {Easy} Chunky Chicken Noodle Soup

DIY Icy Winter Branches & Arrangement

DIY Icy Winter Branches & Arrangement

A Farmhouse Winter

A Farmhouse Winter

Facebook

My Home

 My Home

Amazon

Follow @TheEverydayHome
Instagram

15 MUST HAVE Pantry Organizing Ideas

15 MUST HAVE Pantry Organizing Ideas

Categories

Recent Posts

  • Where to Begin Again?
  • Happy August!!!! Free Calendar Printable
  • How to Plan a Cruise
  • Natural Hormone Support Class
  • Share It One More Time Inspiration Party #110

Popular Projects

Popular Projects

Links

Links

Archives

  • April 2020
  • August 2018
  • July 2018
  • February 2018
  • January 2018
  • December 2017
  • November 2017
  • October 2017
  • September 2017
  • August 2017
  • July 2017
  • June 2017
  • May 2017
  • April 2017
  • March 2017
  • February 2017
  • January 2017
  • December 2016
  • November 2016
  • October 2016
  • September 2016
  • August 2016
  • July 2016
  • June 2016
  • May 2016
  • April 2016
  • March 2016
  • February 2016
  • January 2016
  • December 2015
  • November 2015
  • October 2015
  • September 2015
  • August 2015
  • July 2015
  • June 2015
  • May 2015
  • April 2015
  • March 2015
  • February 2015
  • January 2015
  • December 2014
  • November 2014
  • October 2014
  • September 2014
  • August 2014
  • July 2014
  • June 2014
  • April 2014
  • March 2014
  • February 2014
  • January 2014
  • December 2013
  • November 2013
  • October 2013
  • September 2013
  • August 2013
  • July 2013
  • June 2013
  • May 2013
  • April 2013
  • March 2013
  • February 2013
  • January 2013
  • December 2012
  • November 2012
  • October 2012
  • September 2012
  • August 2012
  • July 2012
  • June 2012
  • May 2012
  • April 2012
  • March 2012
  • February 2012
  • January 2012
  • December 2011
  • November 2011
  • September 2011
  • August 2011
  • July 2011
  • February 2011
  • January 2011
  • December 2010
  • November 2010
  • October 2010
  • September 2010
  • February 2010
  • January 2010
  • December 2009
  • October 2009
  • September 2009
  • August 2009
  • June 2009
  • May 2009
  • April 2009
  • March 2009
  • February 2009
  • January 2009
  • December 2008
  • November 2008

Archives

Merry Christmas 2017

Christmas Dining Room

DIY Be Merry Plate

Breakfast Room Christmas Vignette

Tartan Plaid and Berry Christmas Mantel

Christmas Vignette Farmhouse Style

This is what I have been sharing on Instagram. Follow The Everyday Home if you don’t already.

Copyright @2017 © 2023 The Everyday Home · Blog Header Designed by The Everyday Home