Have you priced art lately?
Specifically large art that hangs above a sofa or
on a large wall?
I went shopping for a large piece to
to use for staging the Flip House.
(we’re almost done…yay!)
After the third or fourth store I stopped at with no luck,
I decided it was time to try my hand at a DIY project
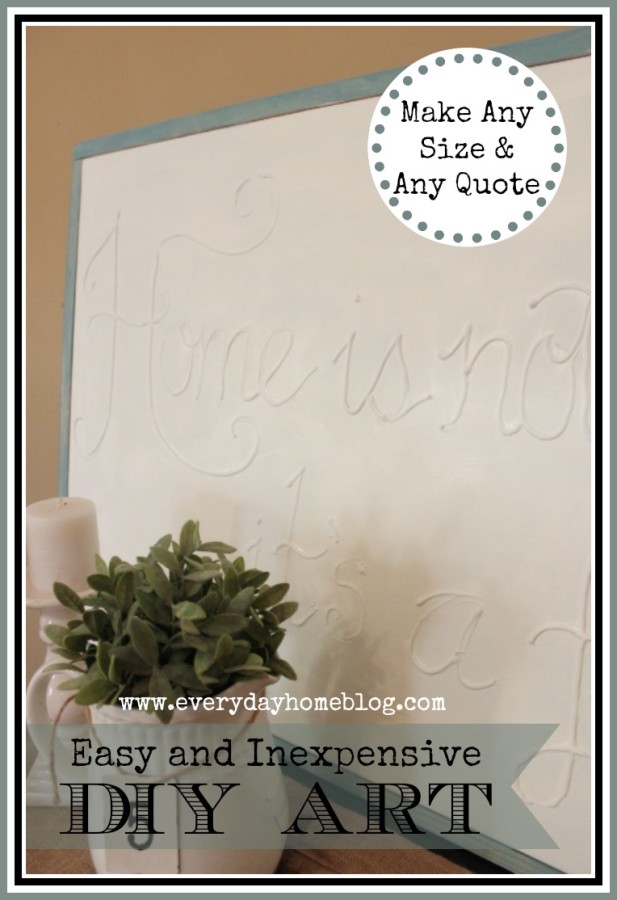
and create some EASY CANVAS ART.

I had seen some similar projects on Pinterest, and it always
piqued my interest. So when I was able to get a large 24×48 canvas
for 40% off at Hobby Lobby…
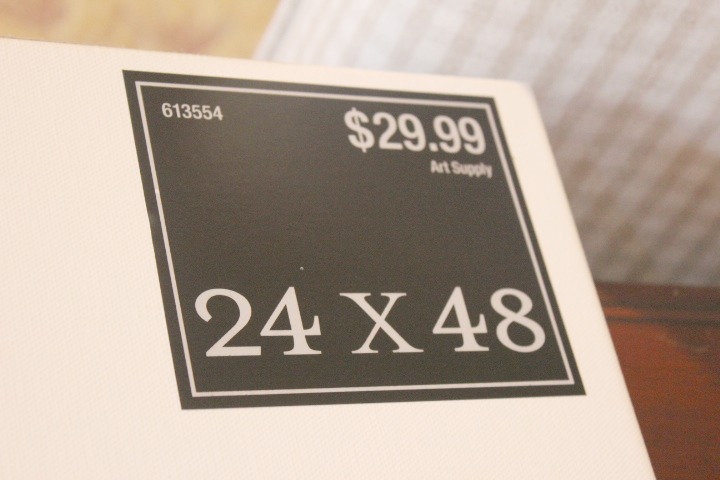
I realized I could have a large, custom piece of art for under $35.
The projects I had seen on Pinterest used Elmer’s Glue to
write out the design and the words. But, every glue bottle I found
had a wide tip opening, and I knew I would need a regular tip opening.
That’s when I went looking at Lowe’s.
“If you need it, we will have it!”
(I think that should be their new slogan)
🙂
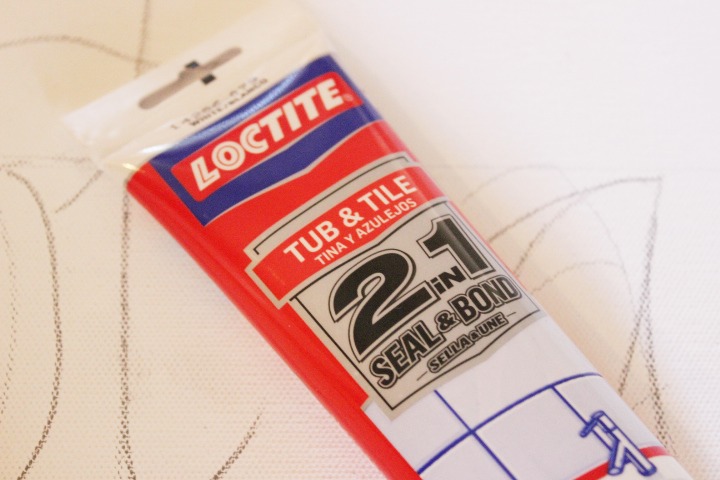
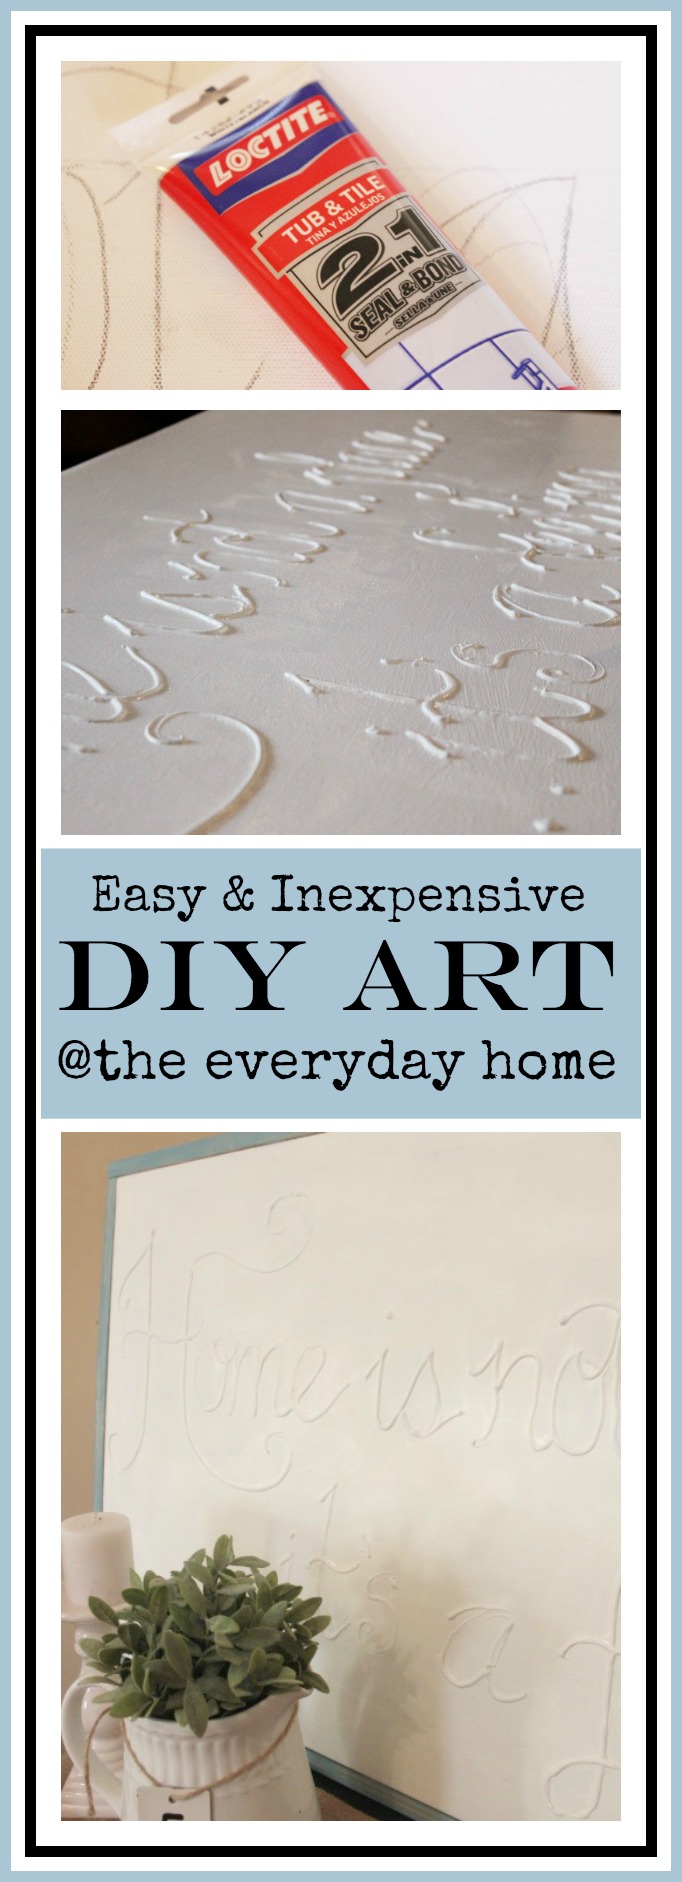
For about $3, I found a tube of Tub and Tile Caulk with a
“writing tip.” But, most importantly, it was paintable
and quick-drying. I also liked that it was low-odor, too.
I cut away a small tip, tried out the size of the bead of caulk
it put out, then decided to cut a slightly larger opening for
a larger bead, or flow of caulk.
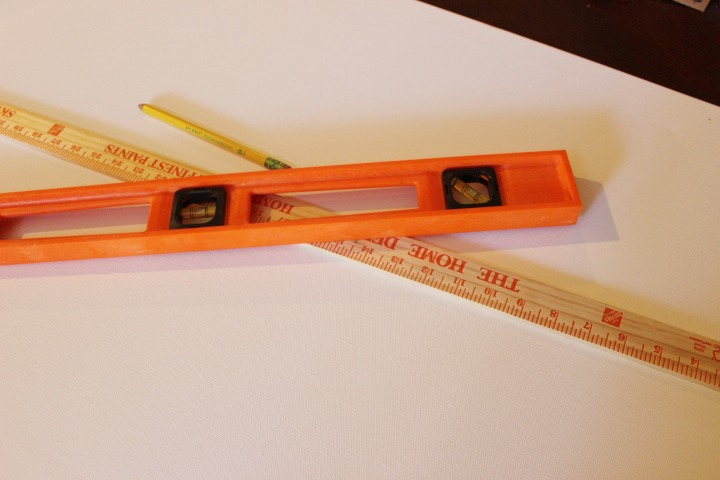 Next, I grabbed a yardstick, level and a pencil.
Using a little Monkey Math, I made some lines on the canvas
according to the size I wanted my words. I wanted
two rows of wording, and I wanted the wording 6″ tall.
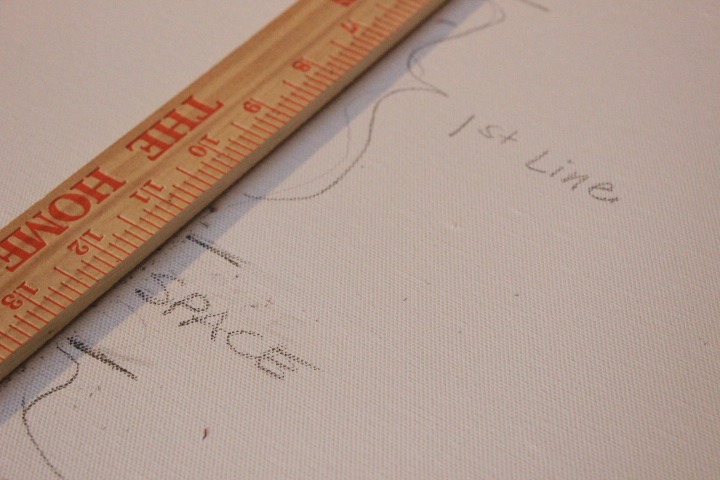
I drew the lines completely across the canvas.
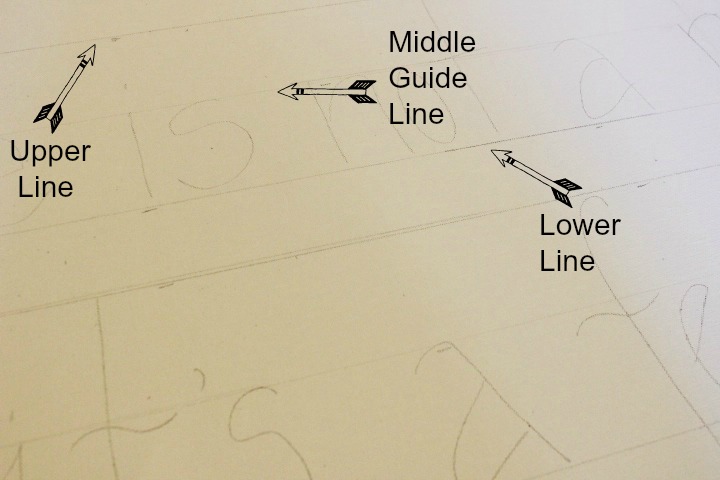
I also add a line in the middle of the top and bottom lines,
so it would give me a guide when I was writing.
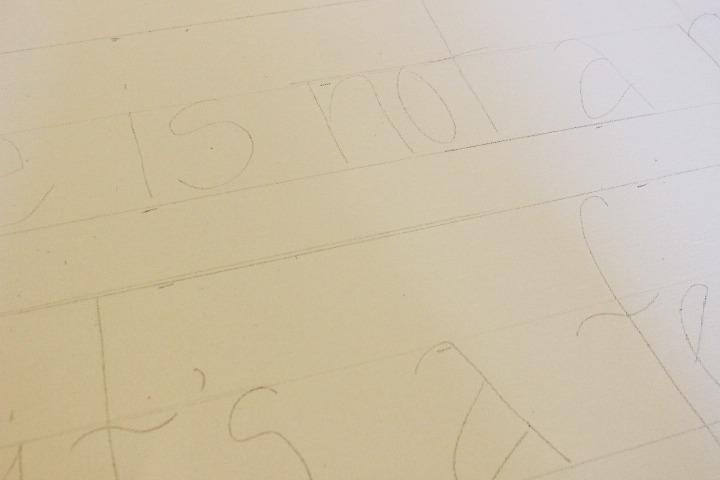
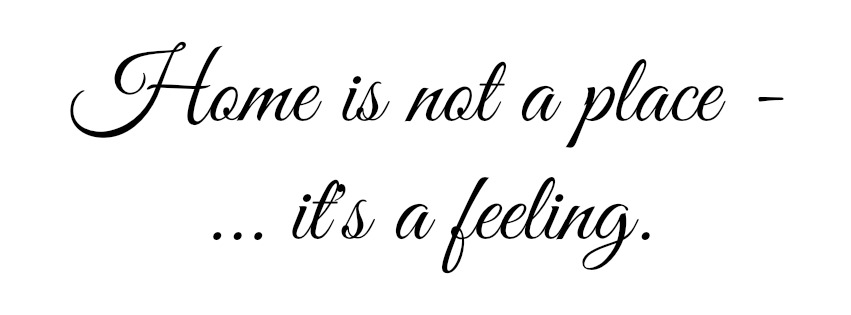
I wrote out the quote in a basic print as lightly as possible.
Don’t worry if you make a mistake or need to change
the lines, etc – you will be painting over it all.
Once I was happy with the drawn out design…
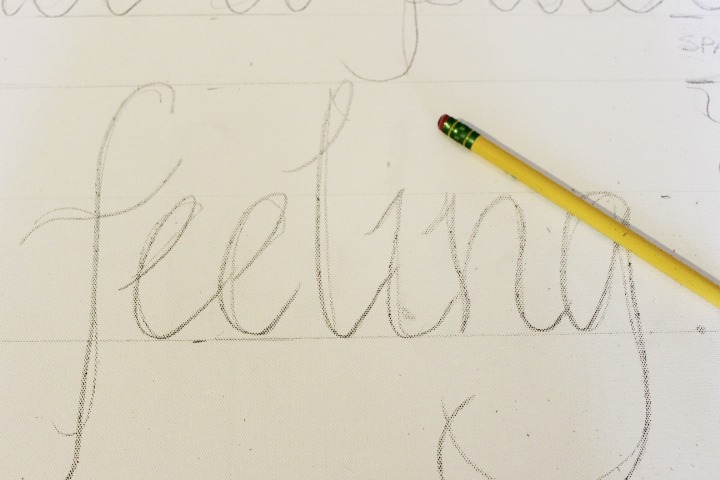
I used the basic printed design as a guide to add the script writing.
I did not use a guide, but if you needed some inspiration
you could create the quote on PicMonkey, for example,
to use as you are writing.
You could, also, print it the design at a larger scale,
then use transfer paper to place the quote on the canvas.
Once I was happy with how the written message looked,
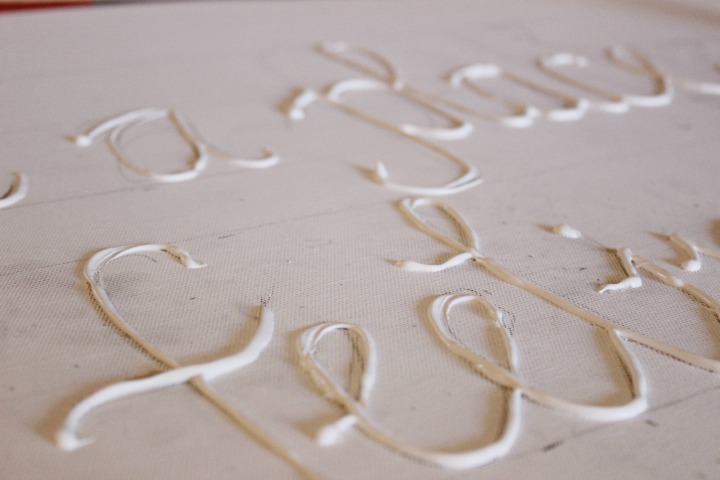
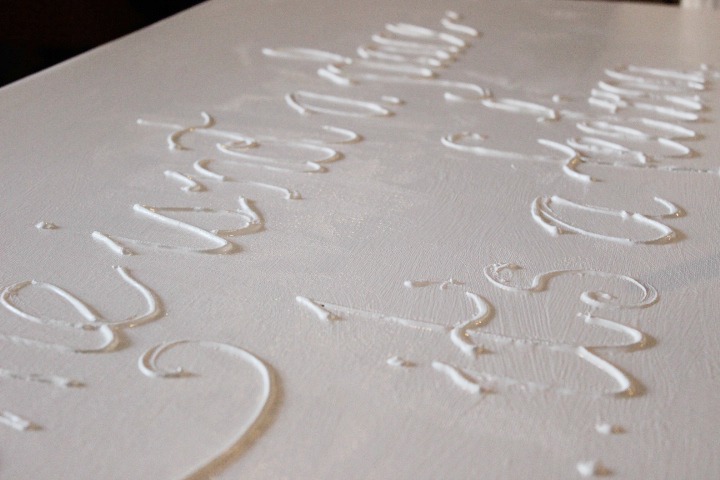
I started writing using the caulk tube.
I soon figured out it doesn’t work as well if you hold
the tube like you would a standard pencil,
but, rather if you hold the tube like you would if you were
holding a piping bag of icing –
you can write and squeeze at the same time.
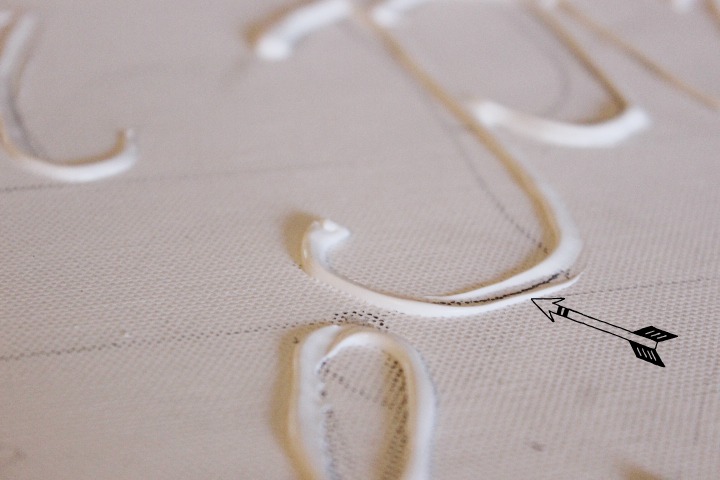
If you try to push the tip of the tube onto the canvas with
too much pressure, you will get the effect above.
But, no worries, just “write” it in with more caulk.
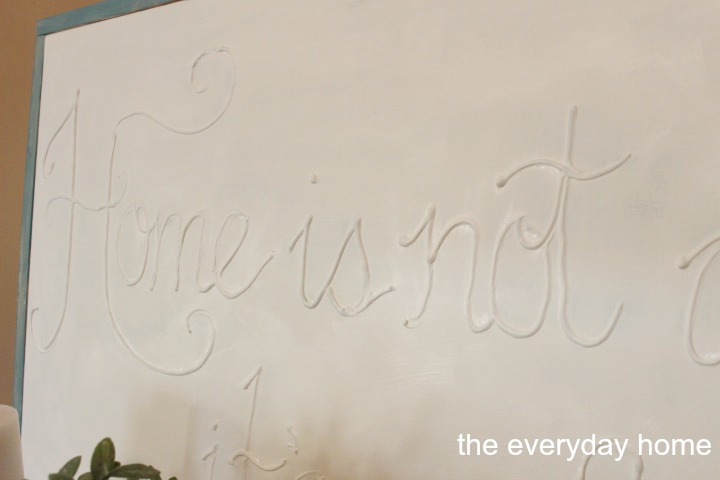
Now…you let it dry.
When the caulk gets to the “almost dry but not quite point,”
dip your finger in a bit of water and gently tap down any
points or tips. For example, the dotted “i’s” had peaks.
Use your finger to lightly smash them down and also smooth
out any rough areas.
Then, let it dry completely…
Have a glass of wine.
Rub the cats.
Check Facebook.
Check Twitter.
*Have more wine.
*(suggestions only. please craft with caution)
🙂
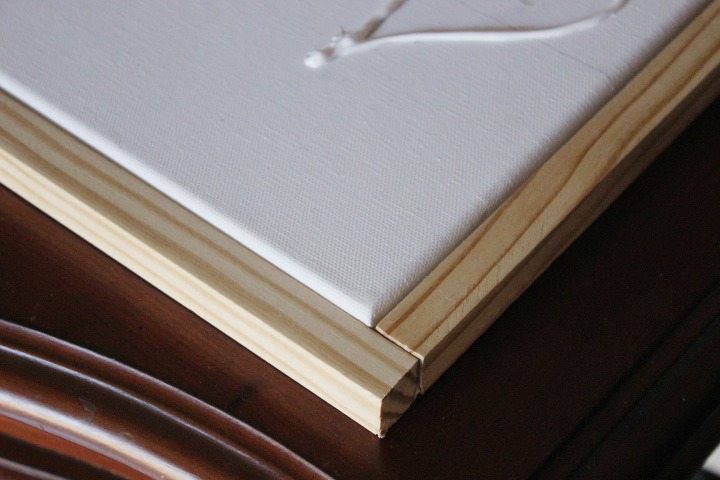
Or you can use the drying time to cut some 1×1 square molding
pieces to “frame” the canvas.
This is totally optional, but I wanted to add
just a touch of color to the all-white canvas.
I used one of my homemade Chalky Paint colors to paint
the molding strips blue prior to attaching them to the canvas.
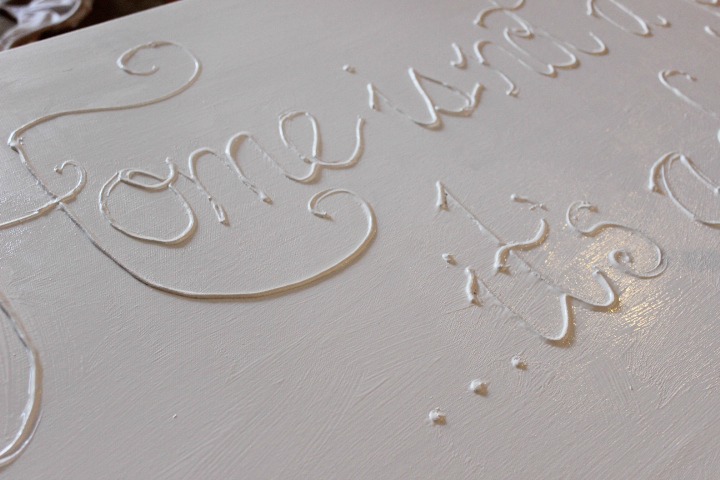
This is the first coat still dampened….
Make sure you do not allow a lot of paint to gather around
the lettering. Use your brush to smooth it away.
And when it is dry…(I painted two coats) attach the
painted molding strips to the outside of the canvas with some
little tack nails.
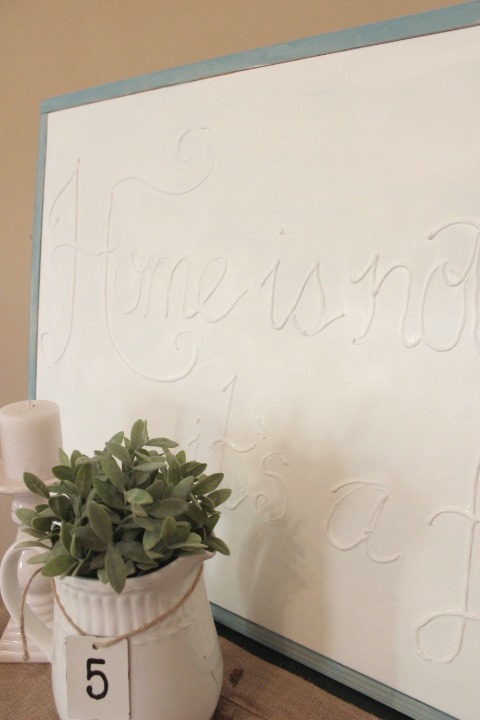
Then, stand back and admire your
Easy Canvas Art.
I will be hanging this in the flip house this week.
I can’t wait to share with you the
Before’s and After’s of this cute home next week.
Cost breakdown:
Canvas with 40% Coupon: $18
Tube of Caulk: $3
(2) 1×1 Trim Molding Lengths: $12
Total: $23
. . . . . . . . . . . . . . . . . . . . . . . . . . . . . .
If you loved this project and would like
to save it for future reference, please PIN one of these
images to your fave Pinterest Board.
{ Simply hover your mouse over the center of the image
and the Pin It “P” will appear. }
. . . . . . . . . . . . . . . . . . . . . . . . . . . . .
Join me on Wednesday, where Mary Beth with Cupcakes and Crinoline
will be sharing a fabulous Guest Post project.
And on Friday, I will be sharing another
“Everyday Home Kitchen Hack.”
Check out my first Kitchen Hack,
“Homemade Jiffy Cornbread Mix.”

You can also follow along with me at:
xxoo, Barb


LOVE IT!!
View CommentVery cute!!
View Comment