Another Day. Another Organizing Project.
Determination is my middle name right now.
I guess “fed up” is my last name.
I have envisioned for years a home where everything had its place.
and I knew where basically anything was located. Right down to
the paper clips. After waiting on that elusive Organizing Fairy
to pay me a visit, it occurred to me I couldn’t wait on that little X$&#%
any longer – she simply wasn’t coming. I’d have to do it myself. 😉
Here is one of the projects I completed this week…
Easy DIY Drawer Organizer

Earlier this week, I shared another Organizing Project – our Dry Goods Cabinet.
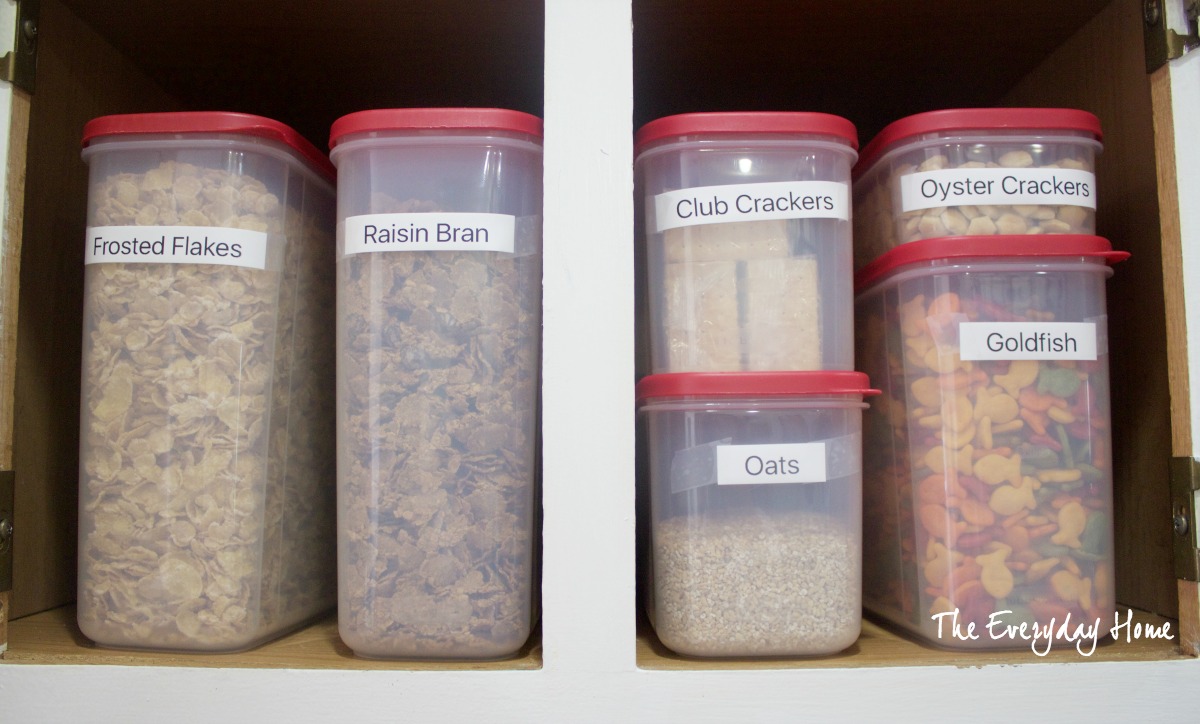
It was a disaster, too. But, it allowed me to catch the “organizing
bug” and now, I am determined more than ever. But, I don’t want
to spend a ton of money, and I don’t want to spend a lot of time.
I mean – I want to be organized but I have other things to do, as well.
🙂
Once again, I must embarrass myself and show you what I started
with. NO judging! I am human. And a hoarder.

DIY Drawer Organizer | The Everyday Home Blog
Yep. THIS little area we will refer to as WWIII. Craft paint, a jump
rope, packets of oatmeal (why?), and Pokemon cards. I mean…
doesn’t every junk drawer hold Pokemon cards?
Now you see why I had to make some changes.
So, I made a trip to Michael’s and picked up 3 strips of balsa wood
for about $10. Balsa wood is extremely soft wood and best of all,
no power tools are needed. If you have a straight edge (ruler, etc)
and a utility or craft knife – you’re all set.

DIY Drawer Organizer | The Everyday Home Blog
First you will need to determine the measurement of the inside of
the drawer, but more importantly, you need to determine what
pattern you want your organizer to be. How many cubbies?
What will the drawer hold, etc? The secret to working with the
balsa wood and making sure you have a really tight fit is to cut
the wood pieces slightly longer (an 1/8″ or so) longer than the
desired length.

DIY Drawer Organizer | The Everyday Home Blog
I started with the longer horizontal pieces.
I did not want this organizer to be a permanent attachment to the
drawer. I wanted to be able to remove it when needed to clean out
the drawer or add a drawer liner.

DIY Drawer Organizer | The Everyday Home Blog
Once I had all of my horizontal pieces cut, I measured and cut the
vertical pieces which would create smaller cubby areas. I decided to
make this particular drawer our “Office Supplies” drawer. I wanted
smaller cubbies for clips and batteries, etc.
Now remember I mentioned I did not want the organizer
permanently attached? Once I was satisfied with the placement of
the organized, I used my handy dandy hot glue gun to assemble the
grid back together again.

DIY Drawer Organizer | The Everyday Home Blog
Honestly, the entire process took about 30-45 minutes.
This made me quite happy, as I plan on making these same
organizers for ALL of our kitchen drawers.

DIY Drawer Organizer | The Everyday Home Blog
It worked out perfectly. Everything in it’s place.
But, I decided to go the extra step and customize it a bit more.

DIY Drawer Organizer | The Everyday Home Blog
I added labels.
I used the same new Epson Labelworks Label Maker I had used
on my Dry Good Cabinet Project. This time I used one of the clear
tapes that comes with the kit, and I also changed up the font, just
for fun. 🙂 If you would like to know more about the Label Maker,
which I am head over heels in love with, you can go HERE.

DIY Drawer Organizer | The Everyday Home Blog
I’m pretty sure you will agree the AFTER is a whole lot better than
the before. And no oatmeal packets to be found.

DIY Drawer Organizer | The Everyday Home Blog
Maybe now, when the grandloves ask me for a pencil, or tape, or
batteries, it won’t take me 15 minutes to find them.

DIY Drawer Organizer | The Everyday Home Blog
Thank you for letting me share my
Easy DIY Drawer Organizer.
Is this a project you think you can do, or will do?
I would love to hear your comments below. Tell me how you
would use this organizing idea.
xxoo, Barb
……………………………………………………………………
Please Don’t Forget to Share It & Pin It!
Do you follow me on Pinterest, Facebook, Twitter & Instagram?
I would love for you to share these images on your fave social media sites.
Simply scroll the upper left of image and click the social media icons of your choice.

……………………………………………………….
Thank you for spending a few
minutes of your day here with me.
You can follow along with
The Everyday Home here….
Here are some of the Link Parties I may be sharing this post with.
You can find more parties on my Linky Party Page.
” Make Yourself at Home!”


Barb, I love this drawer organizer! Now, I have a couple of questions for you. You said the secret is to cut the strips of wood 1/8″ longer than you need. Do you just smash them into place and they stick? I know balsa is very pliable. Also, where do you put the dots of hot glue? Did you take the whole grid out and glue the inside pieces together? Please forgive me if these are stupid questions: I want to imitate you, and I want to make sure I do it right!
Thanks for the inspiration!
View CommentThis is a great idea, and I should really be doing this! Thanks for sharing at Merry Monday! : )
View CommentGlad I stopped by your blog. Thank you for sharing it on the #HomeMattersParty
View Comment