Happy Wednesday, my Everyday Friends.
Here at The Everyday Home, Wednesday means
#GuestPost day. So I am very happy that Kirsten with
Sweet Tea and Saving Grace is back with another
great tutorial for a
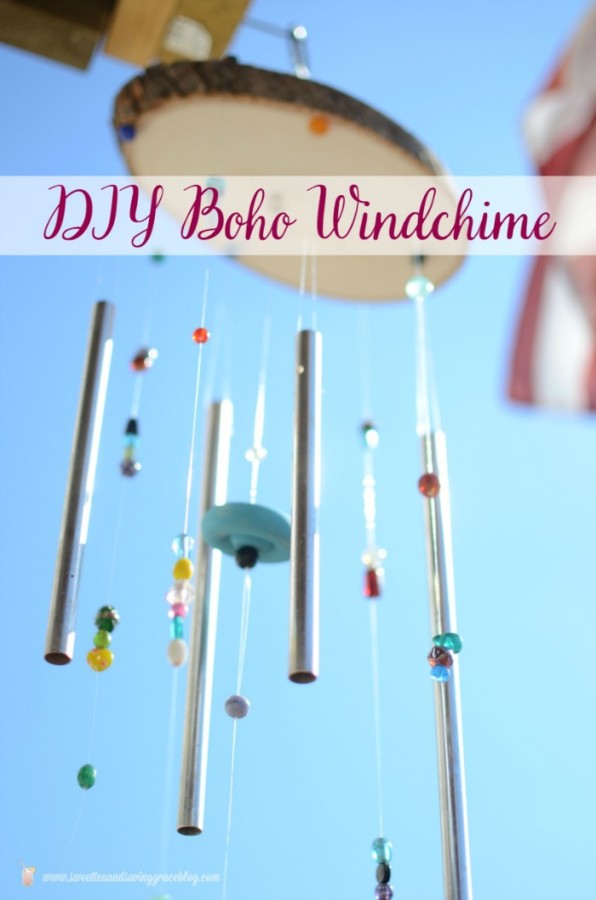
DIY Boho Windchime.

Hey y’all! I’m Kirsten from Sweet Tea & Saving Grace, back
again with another fun DIY project! We’ve had a couple days
of really beautiful spring-like weather lately and it’s left me
with some serious spring fever, so I decided to make a project
for the outdoors to help usher in the season! Today, I want
to show you how to make your own
DIY Boho Windchime.
Last summer, my husband and I built a deck…
ok, I won’t lie – my husband built a deck. I supervised
and hammered a few nails. I love adding little decor pieces
to our new outdoor space, and this windchime is perfect.

To make your own, you’ll need:
*2 wooden rounds – 1 large, around 8-10″ diameter
and one small
(I used a wooden toy wheel)
*Glass beads
*Windchime pipes
(ours came from an old windchime that had fallen apart)
*Vinyl string
*A weighted item, like my little owl
*A ring to hang the windchime from

First, I painted the smaller wooden round bright turquoise.

While that was drying, my hubby helped me drill holes in
the larger wooden round. We drilled one in the center &
8 holes around the outside. There are 4 holes for the
windchime pipes and 4 for strings of glass beads.

Now to make the windchime.
Cut a really long piece of vinyl string and tie it in a slipknot
around the ring. I added a bead to
the string that will sit on top of the large wooden round.
Ok, the rest of the instructions were tough to photograph,
but basically, you’ll follow this process for each of the
4 pipes & 4 strands of beads:
*Slipknot a long piece of vinyl around the ring.
*Push the vinyl string through the top of the large round through
one of your pre-drilled holes.
*Tie a knot directly under the large round to keep the string
in place. Be sure to level the top wooden round as you add
more strings.
*For the windchime pipes: You’ll have two strands of vinyl
string for each of the 8 holes, so split the strands and insert
one strand through each of the windchime pipes and tie a
knot to connect to the other strand.
*For the beaded strands: Just add beads in random order,
making sure they will be long enough to hit against the
windchime pipes.

String the small wooden round in the center of the windchime
the same way as above, and add the weight at the end of the
strand – in my case, this was the owl.

This was the first time I’ve made a windchime, so let me help
you learn from my mistakes:
*If I were to make another one, I’d put the strands of beads
& windchime pipes closer to the center.
*Another suggestion would be to try different kinds of string.
I think the vinyl string will last a long time, but it’s slick so
it has to be knotted multiple times to keep the beads from
slipping off.
Just find a spot to hang your windchime so the wind hits it,
and enjoy the beautiful sounds!

The weather was so nice this past weekend, that I sat on
my deck and enjoyed breakfast while the windchime played
in the background. It was so nice!
For more outdoor projects, try:
 *DIY Pony Bead Bird Feeder
*DIY Deck Sectional
*Our finished deck
I’ll see you next month!
Thanks Kirsten, I LOVE your windchime and I
think this would be a great project for me and my Grandloves
to do together.
If you don’t have any windchime pipes,
you can purchase them here through my *Amazon Affiiliate,
for $16.50 for a set.
If you loved this post, would you please
PIN IT to your fave Pinterest Board…
And also…how about a Tweet…
[Tweet “Make your own Boho Windchime #tutorial @SweetTeaGrace “]
Please join me Friday for a peak at
the Flip House we just completed.
I am sharing an easy DIY Wall Treatment with you.
Thank you for spending a few minutes of
your day here with me.
You can also follow along with
The Everyday Home at:
xxoo, Barb


Leave a Reply