Decking the halls!
And the walls and the doors and the…
Tis’ the season to have cedar clippings and
magnolia leaves strewn hither and there.
And I love it.
Well, not the “strewn” part but the decorating part.
Every year, I raid my yard in what The Hubbs has
deemed “The Great Christmas Shrub & Tree Pillaging.”
I have baskets of fresh clippings everywhere you look –
ready to be placed into anything that doesn’t walk or move. 🙂
Cedar, boxwood, wild magnolia and pine.
Last week, I shared a tiny all-natural wreath I had made
and asked if you wanted me to show you how to make one.
You did!
So here ya’ go…
How to Make a Natural Evergreen Wreath


I understand that not everyone has boxwood
growing in their yard.
Or, five acres of wild magnolia and beautiful NC pine.
I ,also, understand that not everyone has a 12-yr old
rosemary that is more a tree than a plant.
I do get that!

But, here’s a little secret… did you know Lowe’s and
Home Depot give away their Christmas tree trimmings?
That’s right.
All your little arms can carry.
Don’t have any other greenery sources?
Put out a call to family and friends and ask if you can
come raid their yard and give them a free bush pruning.
I used four types of greenery…
boxwood – rosemary – cedar – wild magnolia.
You could also use just two types of greenery, or if need be –
even a single type of greenery.
The wreath-making technique is the same.

My preferred type of floral wire is a 1/4-lb wire on a
paddle. It’s easier to use and prevents the wire from
becoming uncoiled like some other spools.
Let’s get started…

Make an Evergreen Wreath | The Everyday Home
All of my cuttings are about 8-12″ long. They have been
given a good washing in the tub to remove any
“tagger-alongs,” aka bugs.
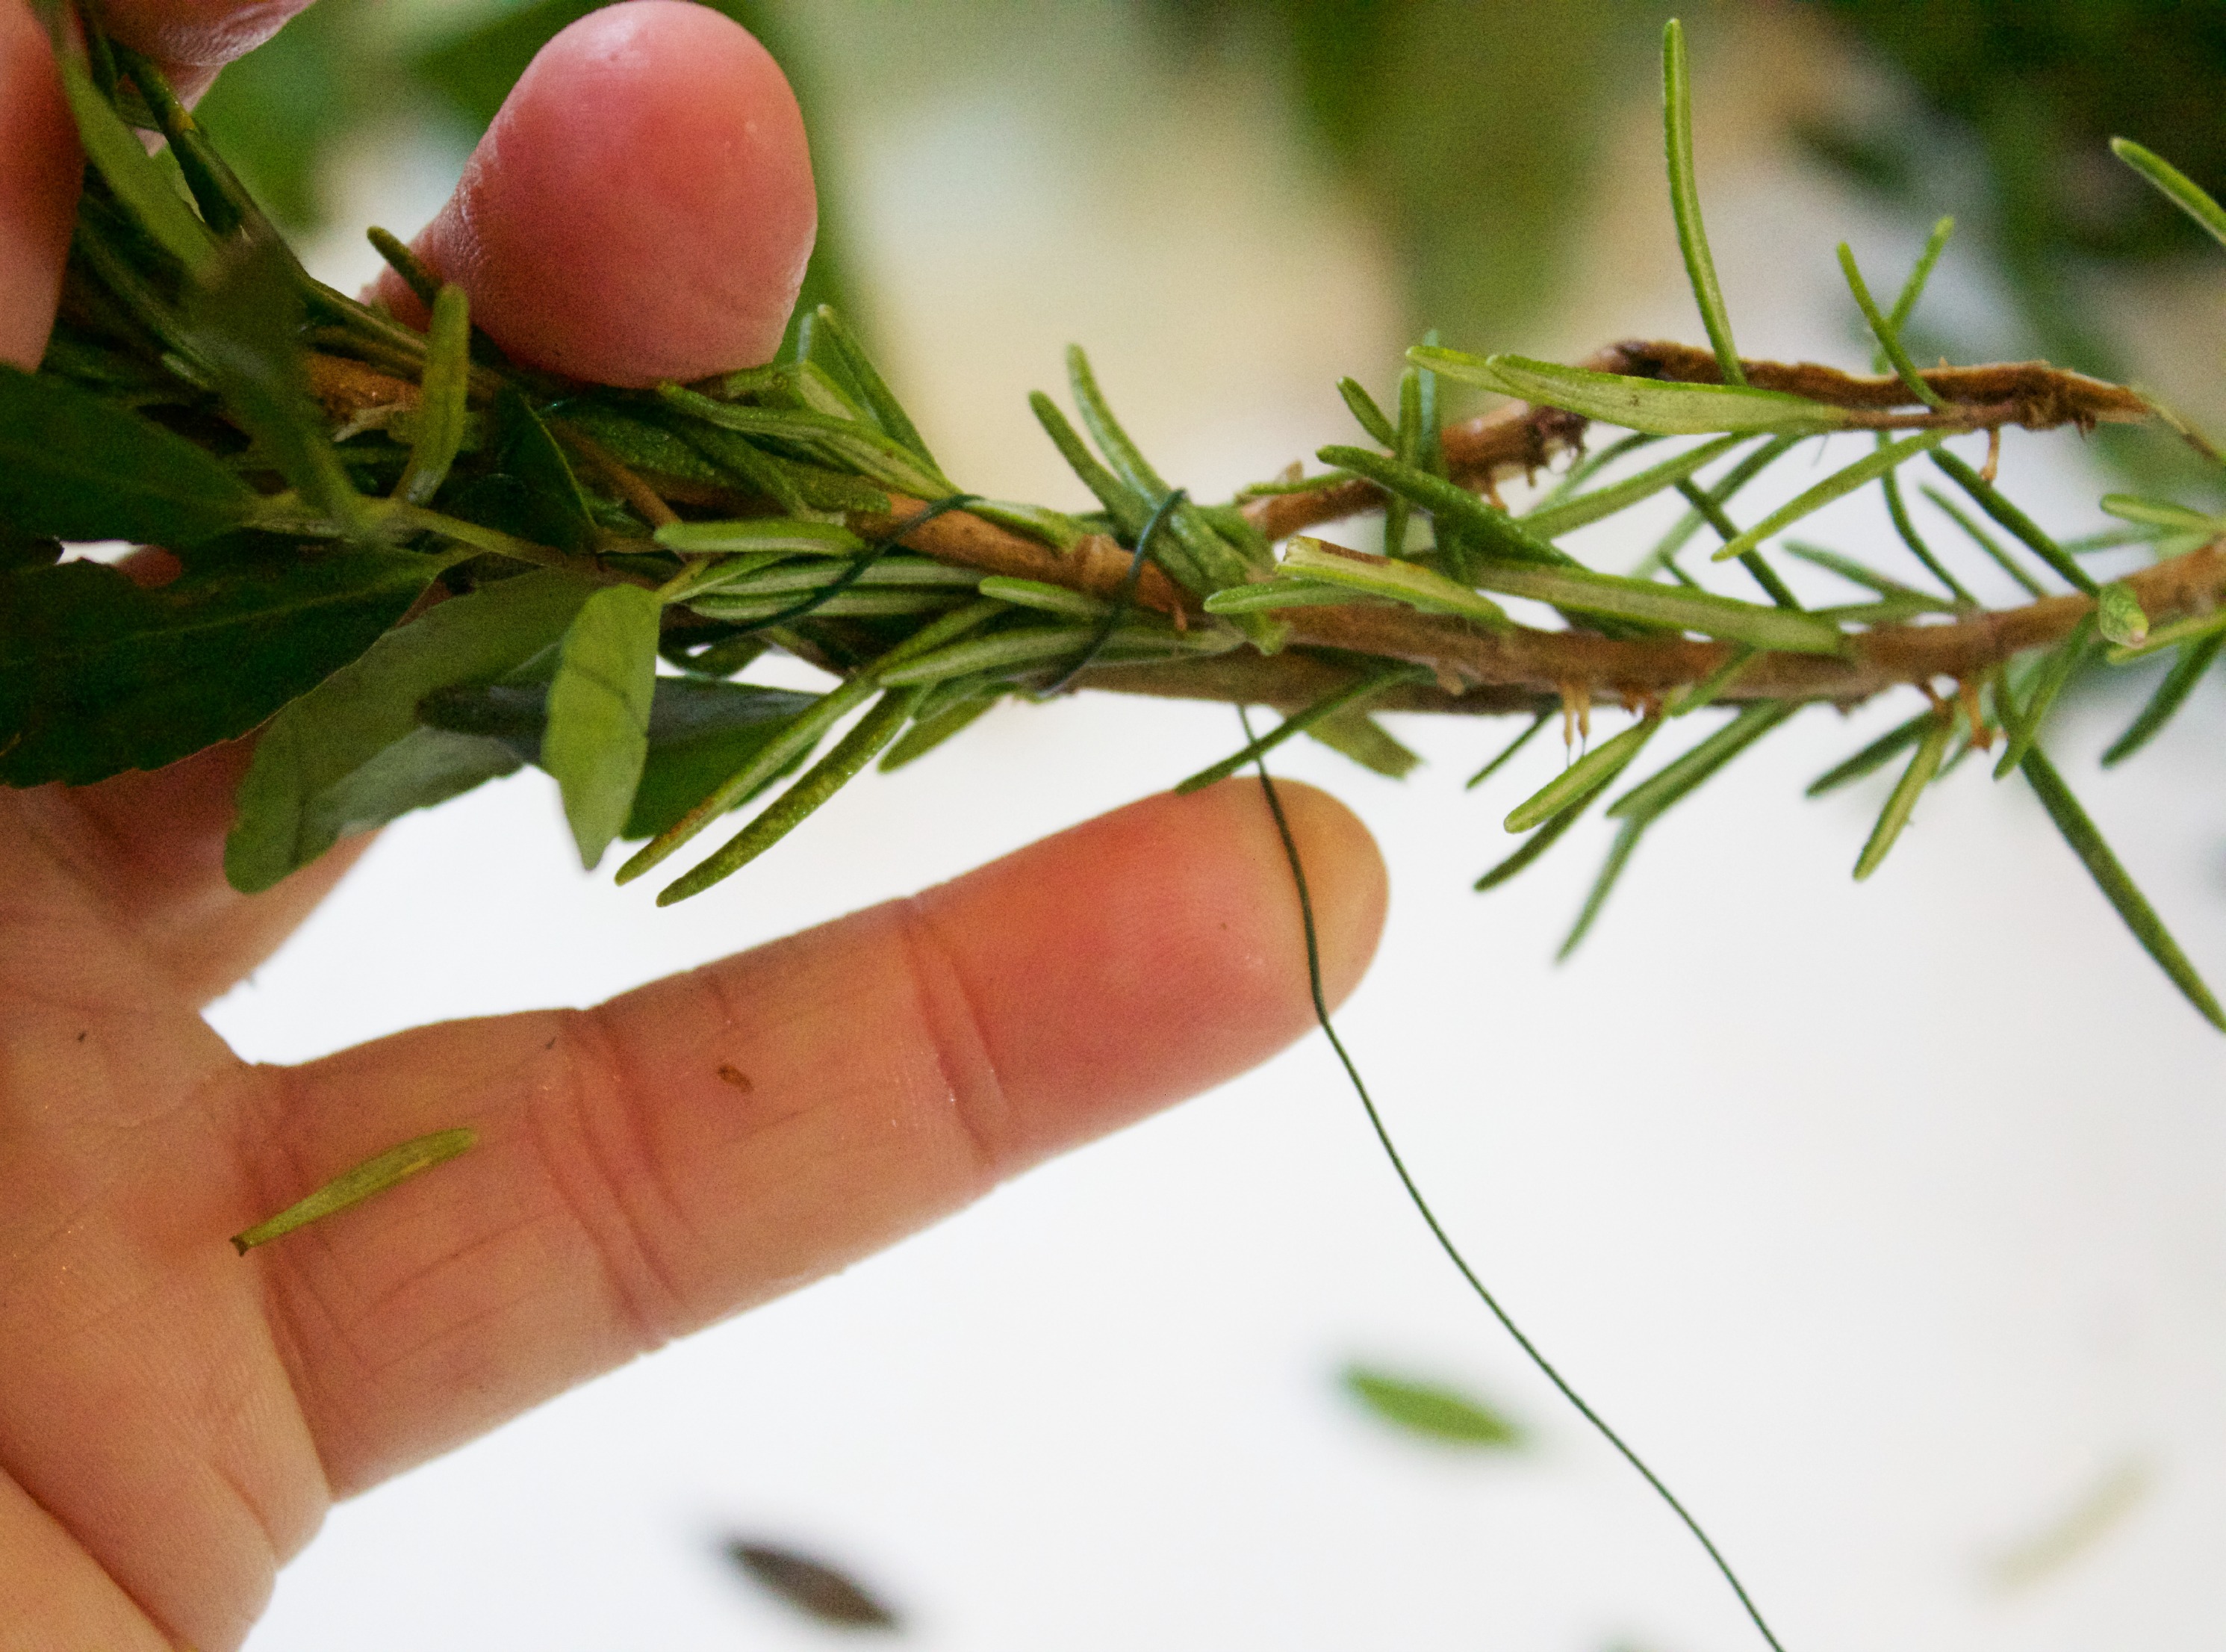
Start with a single cutting, and wrap the stem with wire
several times. You will note as we go along, I do not
use a wreath form, etc.

Make an Evergreen Wreath | The Everyday Home
Grab a second cutting, and “squish” it together at
the base of the leaves just above the stem, then place
the second stem about halfway
down the first stem, on top pf each other.
Continue wiring the two together.

Make an Evergreen Wreath | The Everyday Home
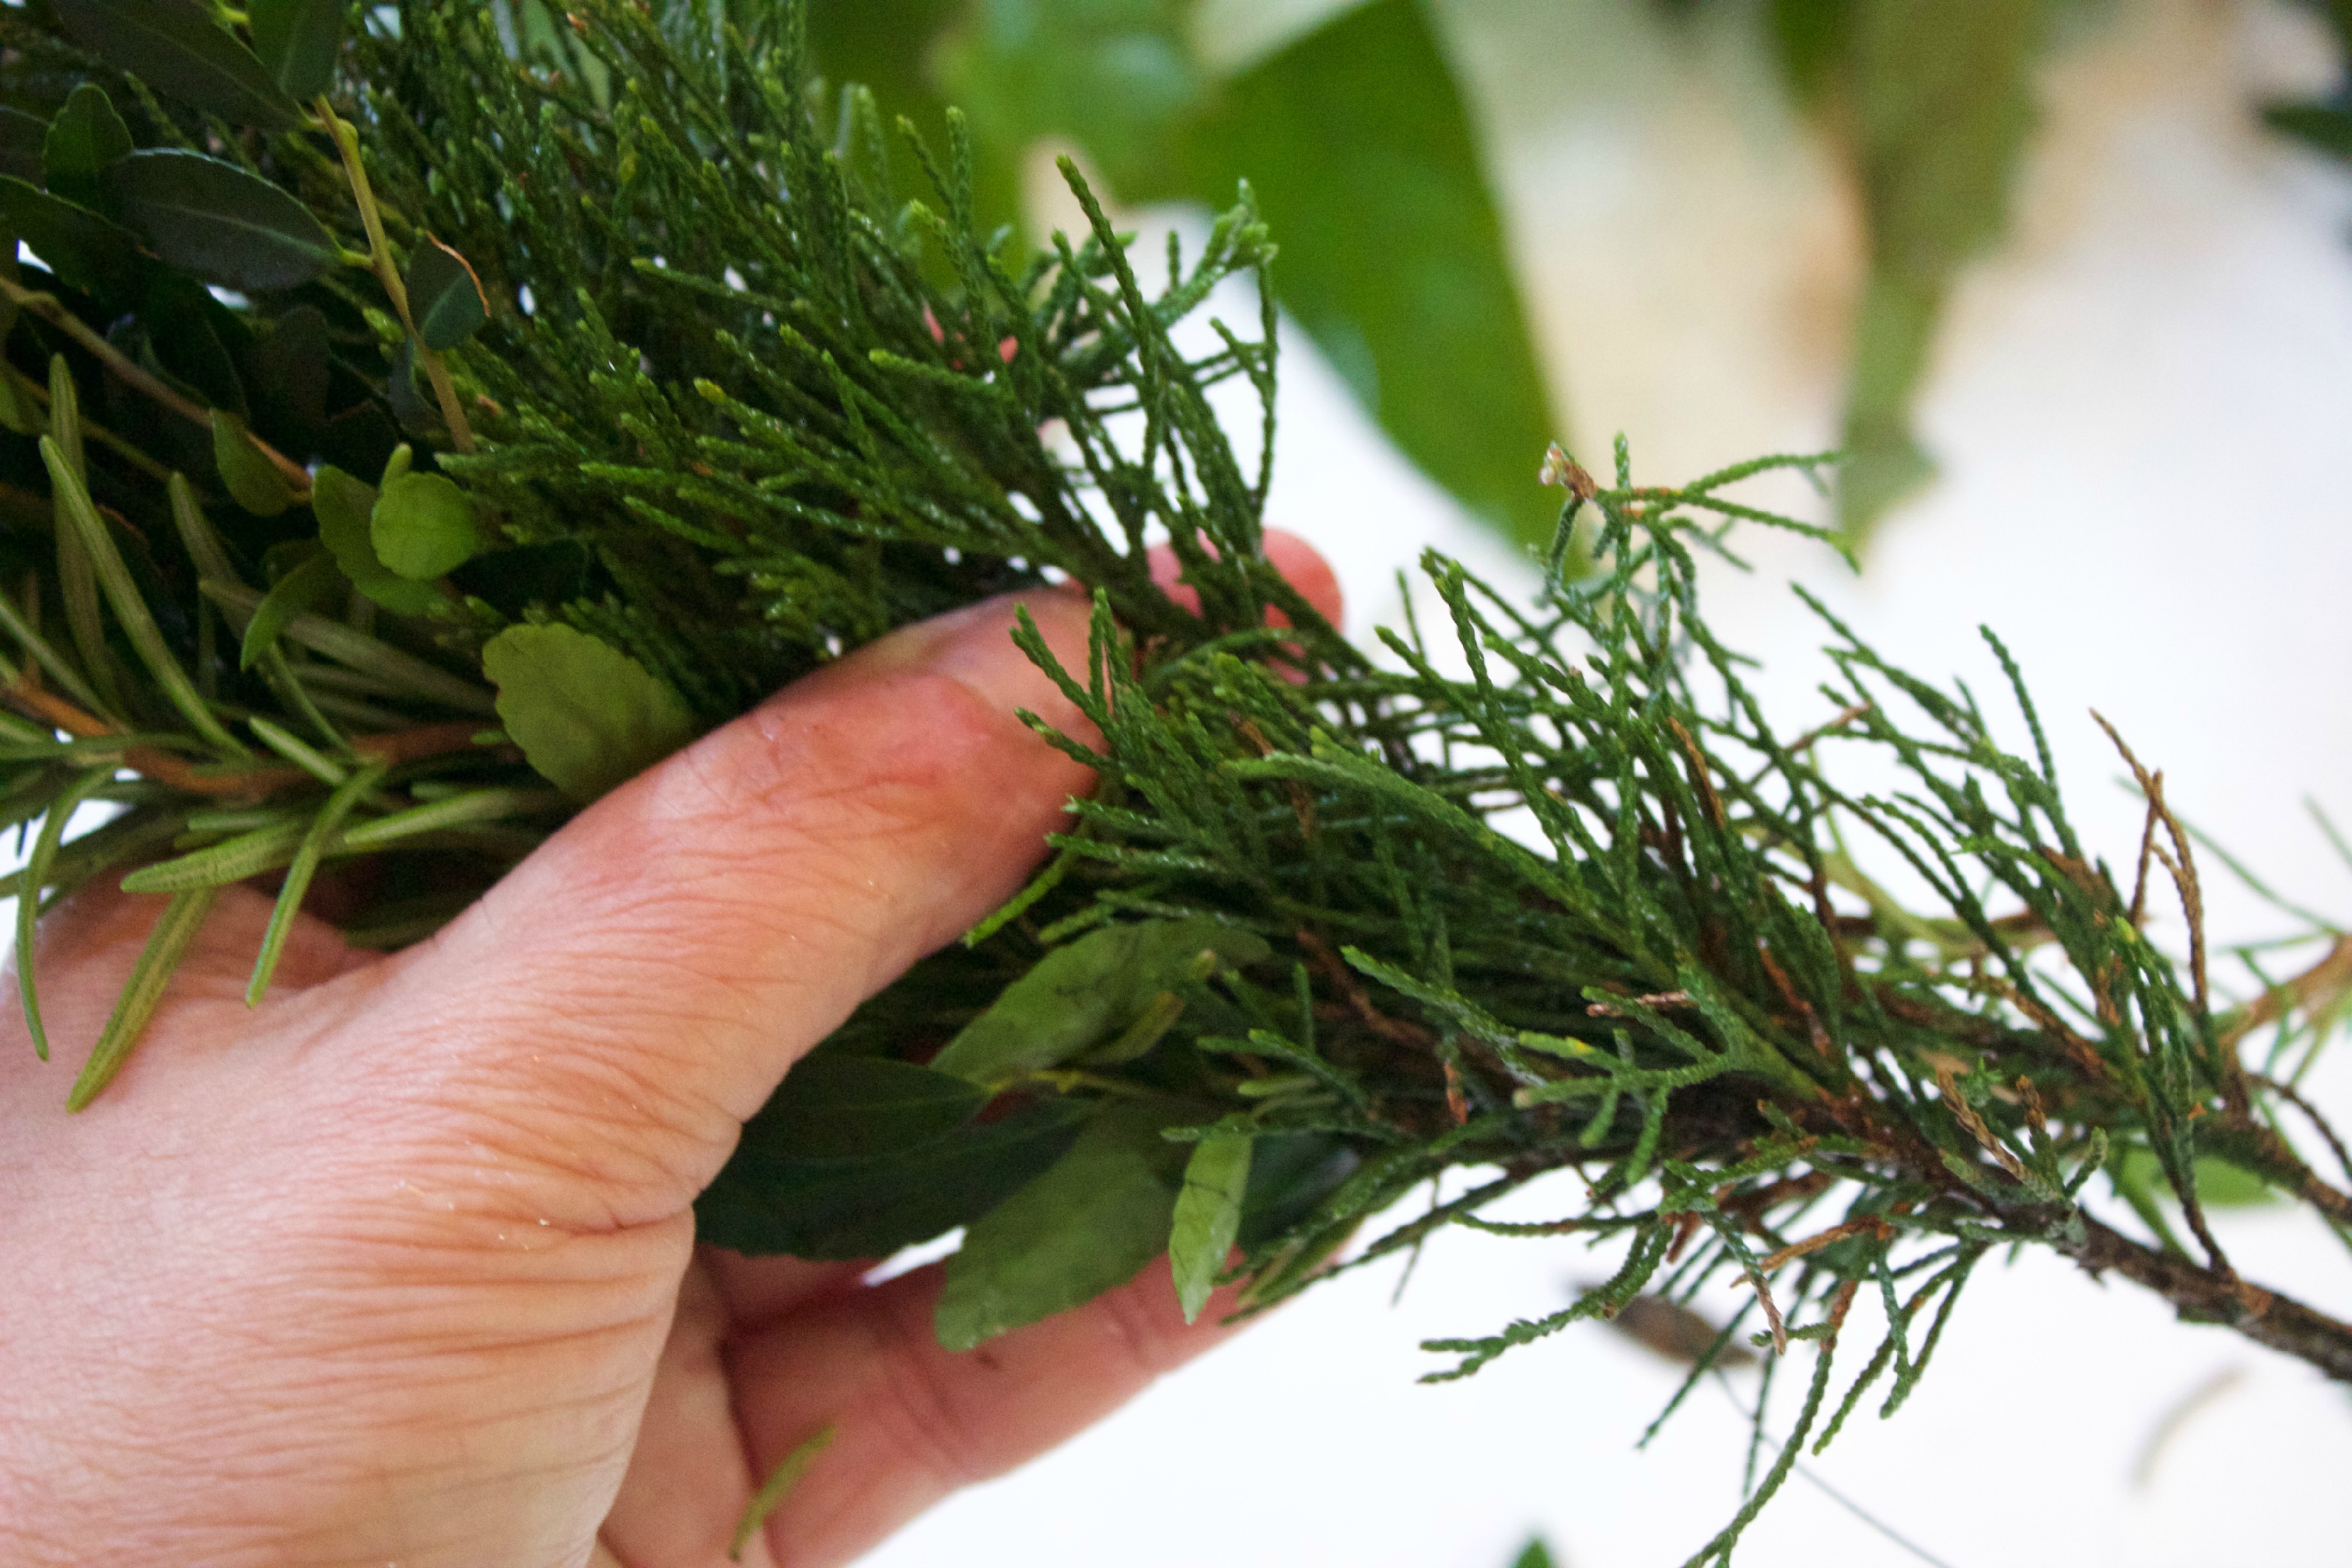
Now start layering additional types of greenery, as
available. I used the stems of rosemary and magnolia
more as “filler” which I place on the sides primarily, to
add bulk to the “garland.” Always lay the newer stem
slightly further down the stem of the cutting you are
placing it on top of, so it creates a “layered” effect.
Keep wiring tightly as you work.
It doesn’t matter if you are working with
only two types of greenery or five –
try to alternate the stems as you go so when the wreath
is formed all of the stems will be distributed evenly.
Also, make sure you maintain the same thickness
throughout, too.
Once you have a long enough garland required to
make the diameter of wreath you desire…

Go thru and add more wire here and there
to secure it all, as needed.

How to Make a Natural Wreath | The Everyday Home
To create the wreath, simply shape the garland into
a circle and use more wire to secure the two ends together.
If you created a garland with enough thickness, the
wreath should easily hold its own shape. If the wreath
is too flimsy, unwire it and add more greenery – or
its possible you wired all of the pieces too far down
on the stems.
Now, as I said. I did not use a form, but if you have a
wire wreath-making form, the concept is the same.

How to Make a Natural Wreath | The Everyday Home
If you have a few bare spots, go ahead and tuck in
a spare piece of greenery here and there.
Finally, add a wire hanger on the back.

How to Make a Natural Wreath | The Everyday Home
Okay, I cheated.
This wreath isn’t exactly 100 percent natural.
I did add some faux berries.

How to Make a Natural Wreath | The Everyday Home
I am so in love with this ribbon from Hobby Lobby.
It is a sweater ribbon and I want to add it to everything.
This is the theme ribbon for our kitchen this year.

How to Make a Natural Wreath | The Everyday Home
Right now, it’s hanging on the wall above the little blue
cabinet in the breakfast room area.
Not sure if I will keep it here – it’s a process. 🙂

How to Make a Natural Wreath | The Everyday Home
But, what I am sure of is that I love it.
I love it’s simplicity.
I love it’s texture.
And I love it’s price.
ha!

Iced Mason Jar in Vintage Scale | The Everyday Home
I love how my Iced Mason Jar Candle in the vintage
scale looks with the wreath. This gives you an indication
of the direction I am going this year.

Making an Evergreen Wreath | The Everyday Home
I hope to make several more of these,
and will even use a few of them in the original
garland format.
I hope this tutorial helped you.
Do you have any questions about the process?
Please leave a comment below if so.
Where would you love to hang one of these wreaths?
I’d love to hear your ideas.
Do you follow me on Pinterest?
I share so many fabulous DIYs, Crafts and Recipes,
so please join me.
I would also love it if you would share these images…


Here are a few more Christmas projects from
The Everyday Home….

THE best cookie you’ll ever bake this Christmas…
Cranberry-Pecan-White Chocolate Cookies

How to Make a Goodwill Christmas Sweater
Thank you for spending a few
minutes of your day here with me.
You can follow along with
The Everyday Home here….
xxoo, Barb
Here are some of the Link Parties I may be sharing this post with.
You can find more parties on my Linky Party Page.
Metamorpis Monday | The Scoop | Do Tell Tuesday | homework | Get Your Shine On
Inspire Me Tuesday | The Handmade Hangout | Share Your Style
French Country Cottage | Inspiration Gallery | Tatertots and Jello


Oh, Barb- you did a remarkable job with that gorgeous wreath – it is amazing! I love your choices of greenery – and no one would have EVER guessed that those are faux berries! WOW! Well done, ma’am!
View CommentVery beautiful!! Thank you for sharing your technique!
View CommentLooks so beautiful! Thank you so much for sharing the tip about the hardware stores… I need to run down there asap and see if I can get my hands on some trimmings! Here I was considering buying a little bundle of eucalyptus greenery for $5.99 at Whole Foods 😀
View CommentSuper job on your wreath Barb! It looks beautiful! Thanks for sharing it @ Dream. Create. Inspire. Link. Have a wonderful weekend and take care, Tara
View CommentYour evergreen wreath looks beautiful and those faux berries adds so much to the beauty of the whole wreath. I always wanted to make a wreath but as a first step I have created a board to pin the wreath ideas but don’t know when I will actually make one 😉 Thank you for linking with us at #HomeMattersParty. We would love to have you next week again.
View CommentLove, love this! I have been obsessed about using my evergreens trimmings. We unintentionally did not trim in the fall. Well, I have in December because there is no snow here! I have not made a wreath yet. I will try after reading this blog. Thanks!
View CommentVery beautiful! Love it and that it’s made with natural materials. Thanks for sharing.
View CommentWOW!!!! Great ideas and thank you for the wreath ideas and information
View CommentYour wreath is stunning! I’ve made fresh garlands, but I want to try a wreath one of these years. I already saved your post for reference. Thank you for linking up with Merry Monday – I’ll be featuring your wreath at our upcoming party.
View CommentSo pretty Barb! I love using greenery in wreaths!
I just wanted to let you know that you were featured as a Rockstar at last week’s Creativity Unleashed party! Congrats, and thanks for sharing at our party! https://www.practicallyfunctional.com/creativity-unleashed-202/
View CommentThat is so sweet and thanks for letting me know. I am honored. xxoo
View Comment