I searched everywhere for Fall Plaid Chargers to use on my Fall Tablescape.
I had plaid on the brain and nothing else was going to do. Have you ever had a project that way? You have this vision in your mind and can’t find all of the elements you need? I looked for Fall Plaid Chargers online and I did manage to find some, but they were available last year and well, that didn’t help me very much. So, what’s a girl to do when she needs something particular but can’t find them anywhere? She makes them, of course.
DIY Fall Plaid Chargers

……………………………………………….
It never fails. The very moment I PLAN a design idea versus just going with the flow and letting it organically develop, I run into a road block. Or a design block, in this case. This time, it was something as simple as a charger. Like I said, I looked and looked to no avail. I went ahead and created the tablescape in our Breakfast Room and tried out the other chargers I had on hand – wood, burlap, wicker. None of them looked like I had in mind. Why? Because I had envisioned a plaid charger and I soon realized… nothing else would ever appease me. #BloggerIssues 😀

Finally, admitting defeat – I decided I was going to have to make my own. I found these plain pumpkin-colored chargers at Hobby Lobby which were the perfect color. But, how did I go from this plain charger to a plaid one? I considered fabric and Mod Podge. But, I couldn’t find a fabric like I needed. How about washi tape? Nope, that created lines which were too thick. That’s when I came across these.

Paint Markers. You could also use Sharpies if the colors you needed were available.
Now let me stop here and give you a little disclaimer. If you are OCD and all of your lines need to be “just so” then this is NOT the project for you. LOL I intended from the beginning to create a more free-flow plaid design.

I started out with the black marker. I used a piece of cardboard to create as straight of lines as I could. Again, I just did not overly worry that they were perfect. I did try to make sure the lines were evenly spaced. I simply just eyed the placement.
I drew black lines about every 2″ apart. Once I had vertical lines, I turned the plate around and created horizontal lines which crossed over each other. This is how Step 1 looked.

Next, I used the gold marker to make lines directly on each side of the black lines.

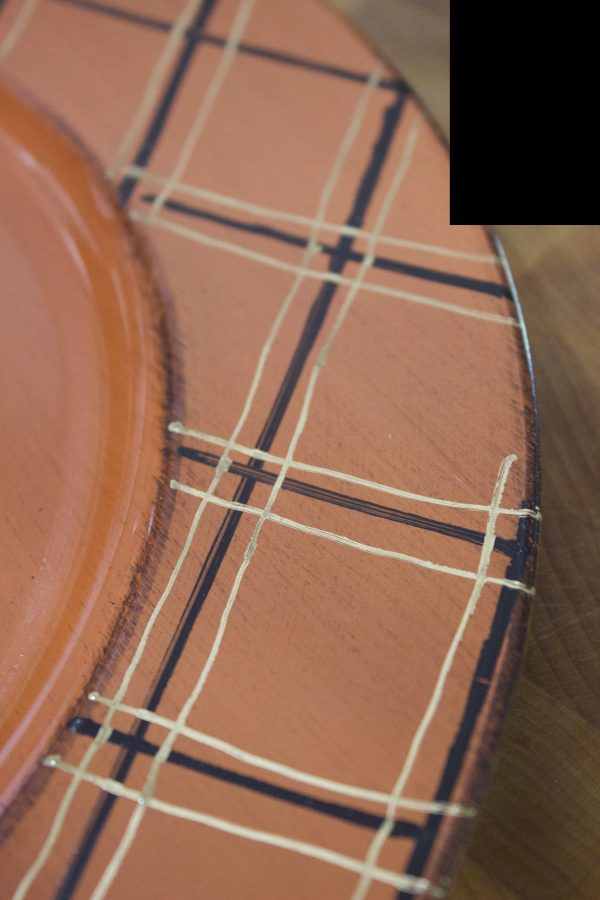
You could choose to use only two colors if you wanted to, but I decided to add a third accent color using a white marker. I added white lines right down the center of the black and gold lines.

The process was really fast. I completed four chargers in about 30 minutes including drying time. If you were unsure what plaid design to draw, I would suggest that you use a piece of actual fabric as a guide for line placement. Once the chargers were dry… this is how they looked.

I was happy with the outcome. And the fact I had only about $25 or less invested was even better. I know you want to see how these DIY Plaid Chargers look with the placesettings on my Breakfast Room Fall Tablescape. Here you go…

I was afraid the black would come across too harsh against the soft colors of the fabric that the dishes were placed on. But, the black was perfect.

I will share the full Fall Tablescape with you on Wednesday. I love how it turned out.

Because I now realize how easy making your own chargers can be, my mind is churning with lots of possibilities for Christmas. I may stick to a plaid pattern in Christmas colors… or who knows what direction I will go.

Is this a project you would like to try? I would love to hear your comments below.
Thank you for letting me share these DIY Fall Plaid Chargers with you.
xxoo, Barb
………………………………………………..


Make Your Own Plaid Chargers…
Acrylic Chargers | White Craft Paint Pen | Black Craft Paint Pen
……………………………………………………………….
More DIY Fall Projects from The Everyday Home…
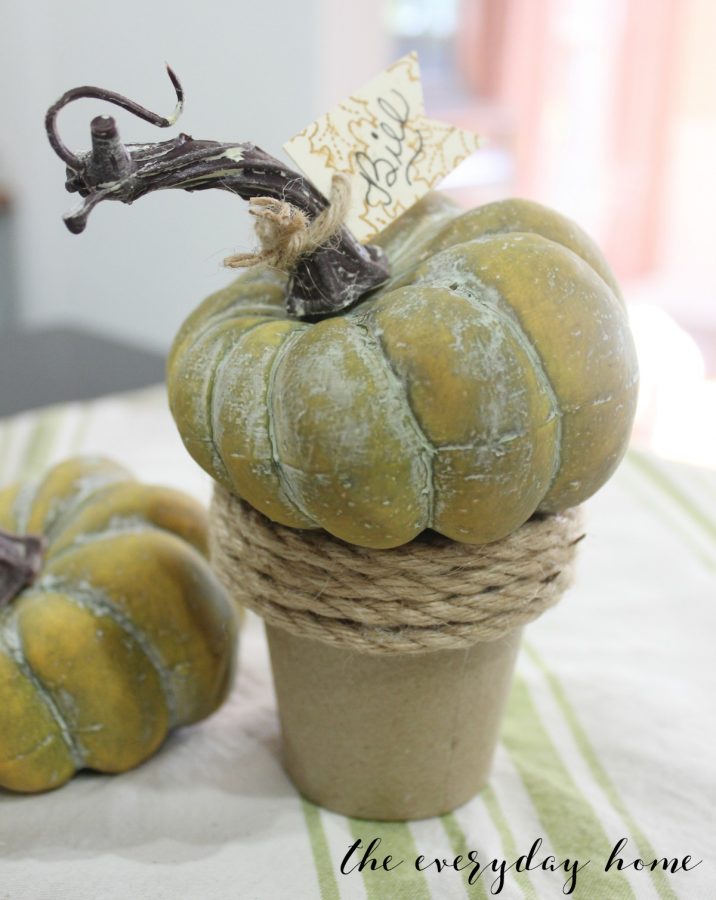
10-Minute Pumpkin Placecard Pot
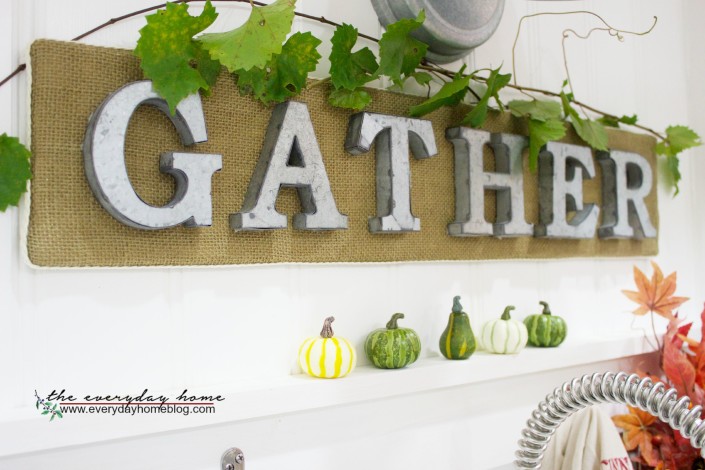
How to Make a Burlap and Galvanized “Gather” Sign
………………………………………………………………….

Do you follow me on Pinterest, Facebook, Twitter & Instagram?
I would love for you to Pin & Share this image on your fave social media sites.
Simply scroll the center of the image and click the icons of your choice.

……………………………………………
Thank you for spending a few
minutes of your day here with me.
You can follow along with
The Everyday Home here….
PINTEREST FACEBOOK TWITTER INSTAGRAM
Here are some of the Link Parties I may be sharing this post with.
You can find more parties on my Linky Party Page.
” Make Yourself at Home! “


A couple of weeks ago, I needed navy chargers and the ones I found online were way too expensive. I painted the rims of gold chargers and they worked just fine. Since I’m in love with plaid, I’ll definitely be using your tutorial to add some flair to my Christmas table setting. Gorgeous!
View CommentLove this!! Your plaid chargers are perfect!
View CommentYour table is going to be beautiful. Those chargers are great.
View CommentWhere are your white dishes from? ?
View CommentHi Erin they are from Lenox but I found them at a thrift store. 🙂 ‘Cause this chick can’t afford Lenox new. haha
View CommentThese are just lovely. I know how it is when you have something in mind and then just can’t find it at a price you want to pay. Making your own is brilliant.
View CommentI love these. And I really understand about having something in mind and nope it isn’t available . Your project came out just great and the table setting looks beautiful.
View CommentOh my goodness, this is just perfect Barb! I agree…the possibilities are endless.
View CommentI share you love for plaid, have actually searched for plaid chargers too! Yours turned out great and I’m so going to do this. So glad you shared at Merry Monday. Pinned.
View CommentOh my goodness gracious! How genius! If there was a vote I’d vote best DIY! I am so going to do this. Off to look for cheap charger plates.
View CommentBut please I would love for you to link at my party! The Fabulous FAll Thanksgiving Party is over here:
http://mychristmasjourney.blogspot.com/2016/11/fabulous-thanksgiving-linky-party.html
Come share the Fabulous idea!
Brilliant!
View CommentGreat project and a creative way to achieve your vision!
View CommentThese are lovely, Thanks so much for sharing on Foodie Friends Friday Party this weekend. This is a terrific Fall DIY project even for teens to help with. Will be pinning and sharing this weekend. Looking forward to seeing you again soon with another great post.
View Comment