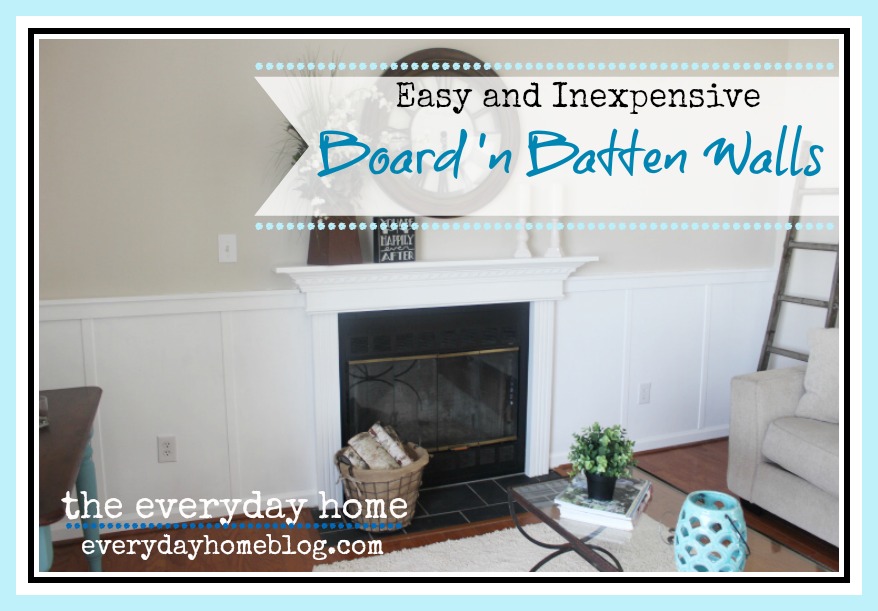
I am happy to say that another
Flip House is complete.
I thought I loved the way the last one turned out,
but this one is just about as cute as can be.
I promise a full tour next week, but I wanted
to share an easy and
Inexpensive Wall Treatment
that has become one of my trademarks
in all of our flip homes.
I do not know of many DIY projects that are
a) this simple
b) this inexpensive to complete, and
c) give so much impact to a space.
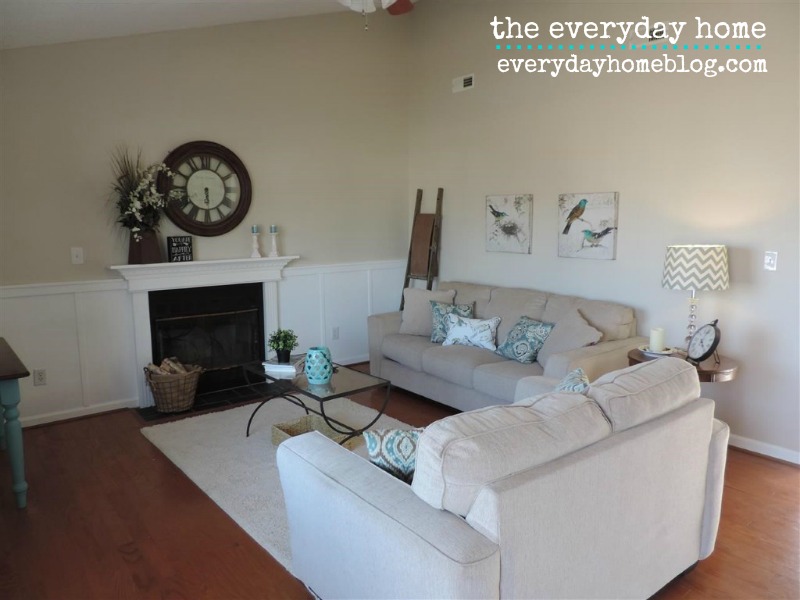
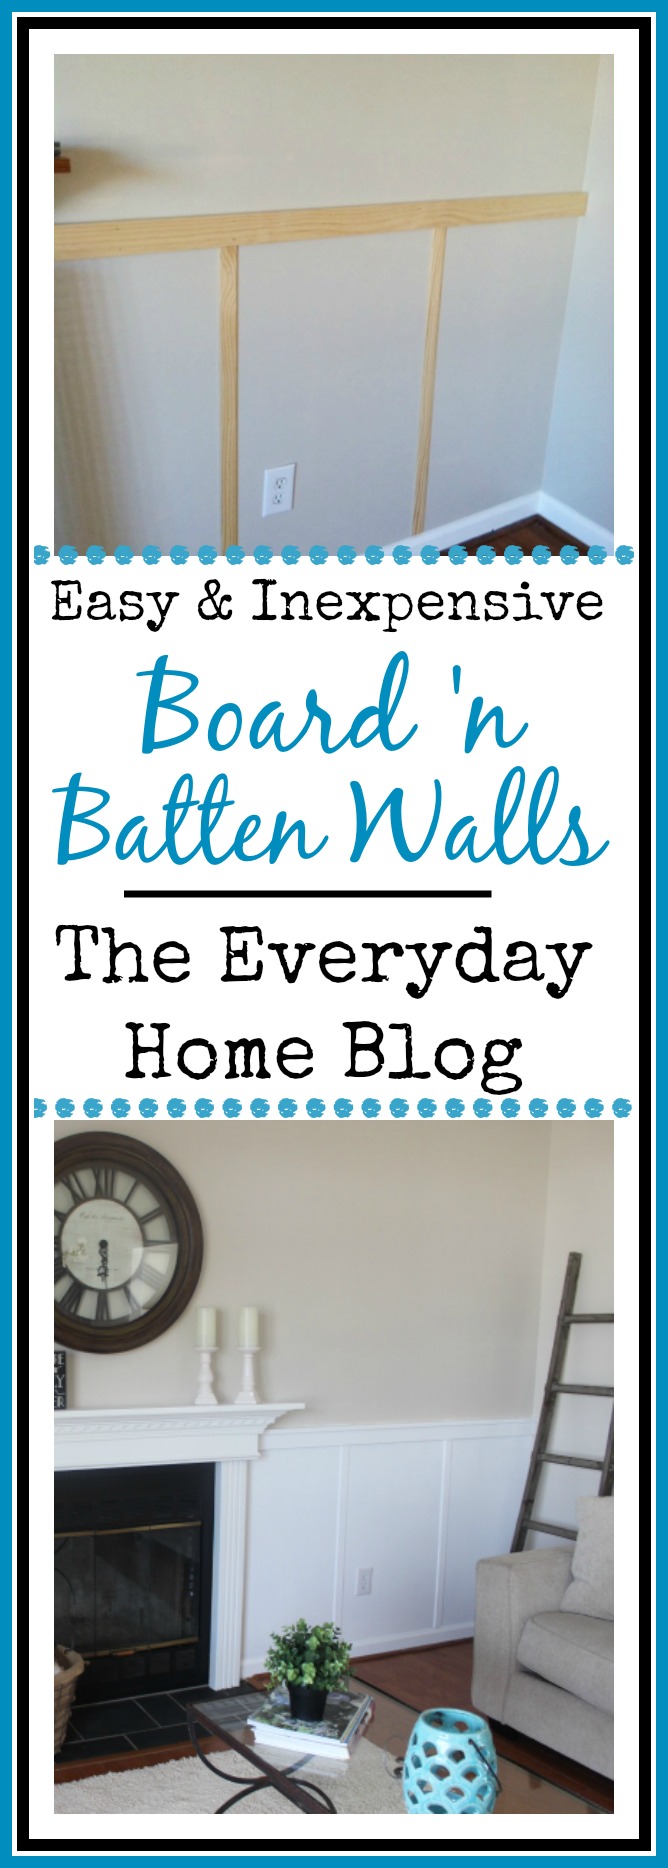
Here is the BEFORE:
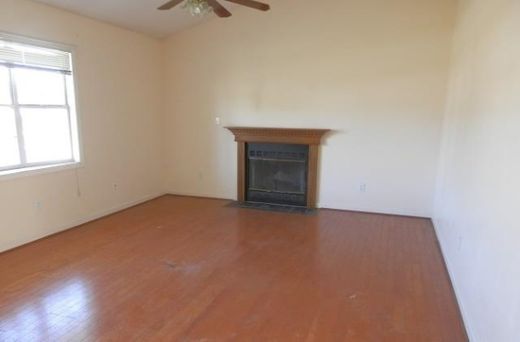
About the only thing going for this room are
the hardwood floors.
No character.
No architectural features.
Plain and vanilla, right?
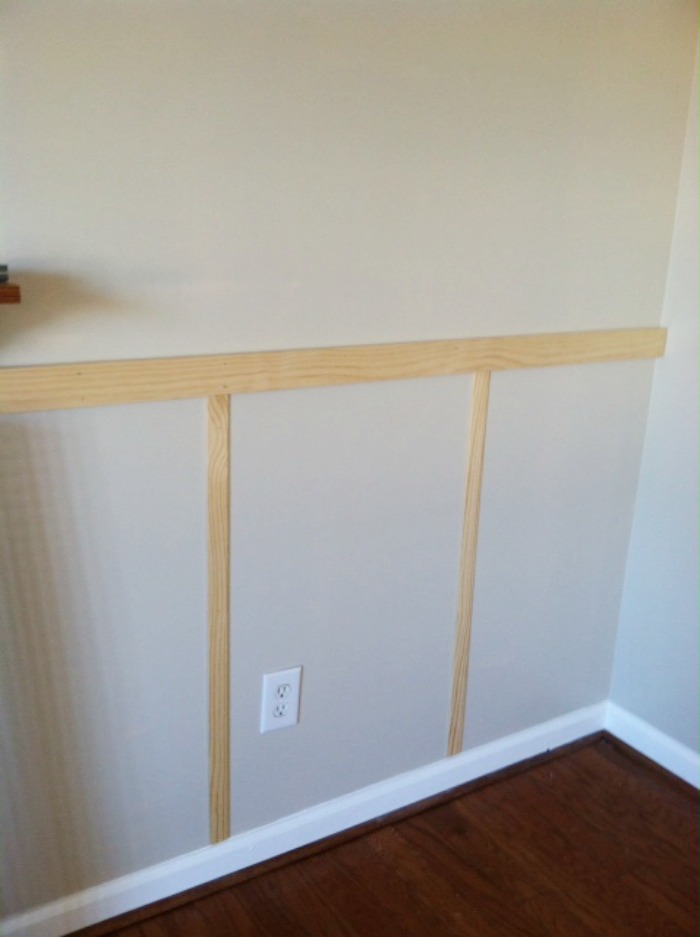
I always use the same size boards every time I create this
wall treatment, but you could vary the size of the boards
you use, or even add more decorative moldings,
to get an entirely different look and feel.
That is one of the things I love about this project –
the versatility.
So let’s get going…
The first step you do, as with any DIY project,
is measure. And, measure again.
You need to determine how high you want the
overall Board and Batten treatment to be
on your wall. I usually make this
decision based upon several factors, such
as, the height of the ceiling, for example.
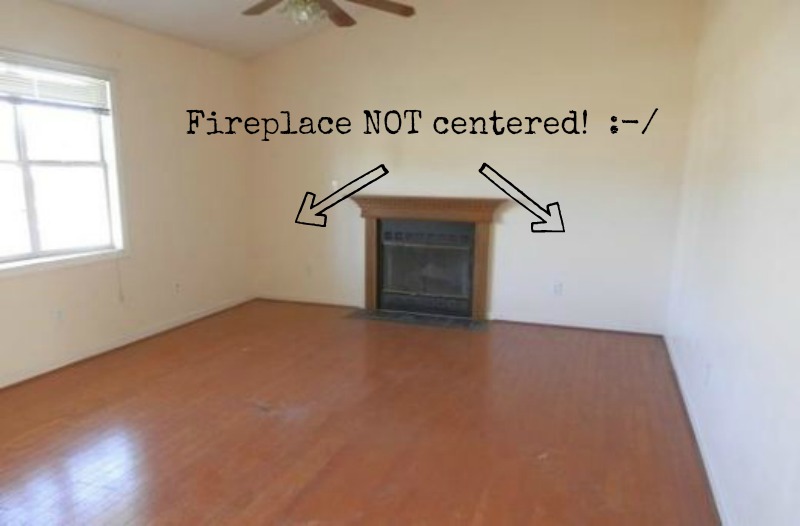
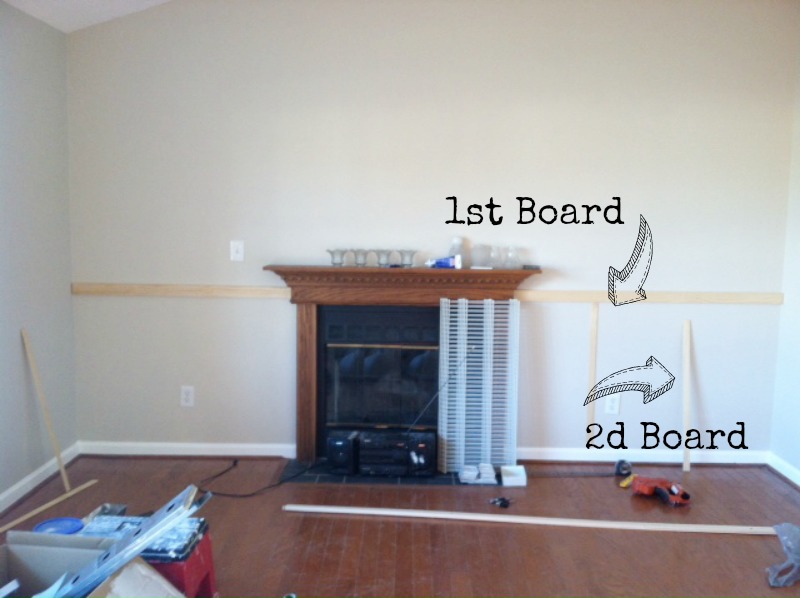
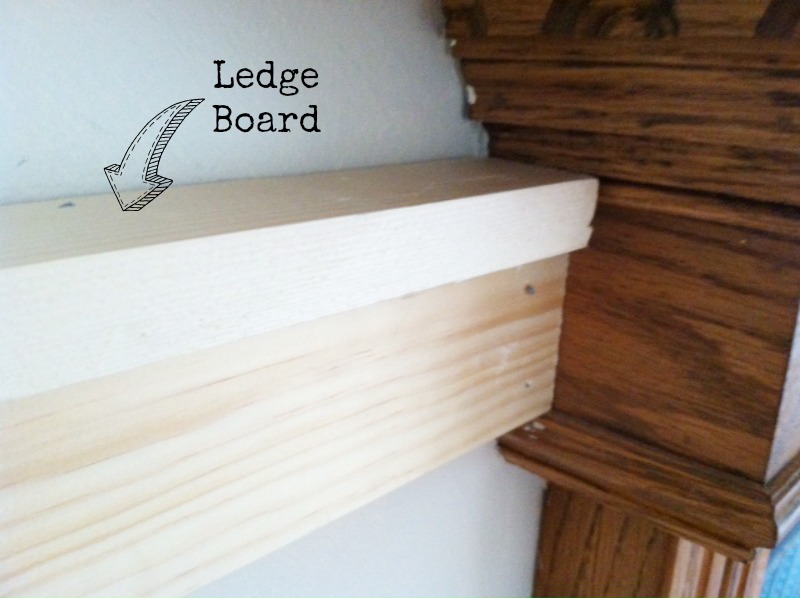
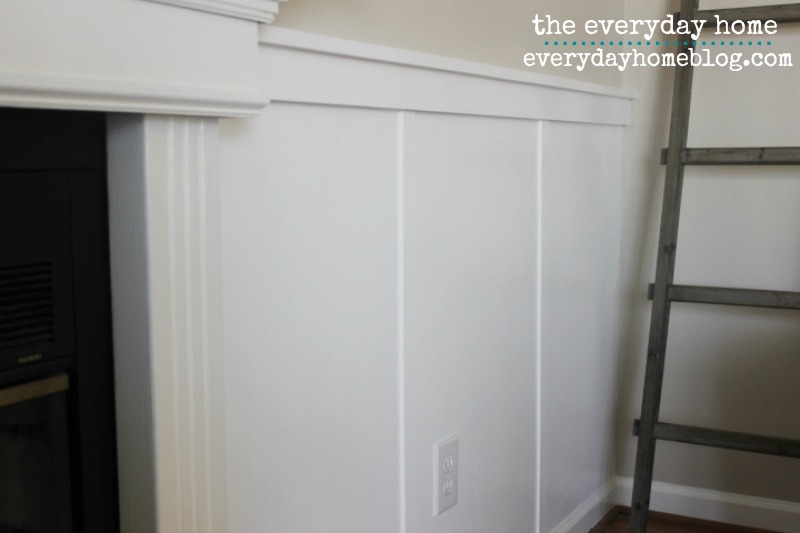
In the case of this Family Room, I used the fireplace
surround as a determining factor.
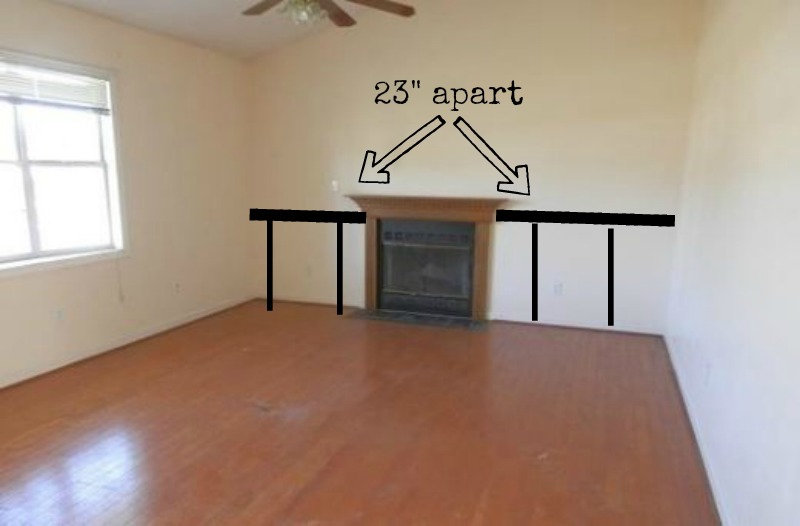
Once I knew all of my measurements in reference
to height, I then determined how many vertical
strips would be needed.
There is no wrong or right number of strips
you must use, nor is there a right or wrong amount
of space needed between each strip. You determine
what looks best to you and to the area where
you are placing this treatment.
Once you have all of your measurements
figured out, you can start cutting your boards.
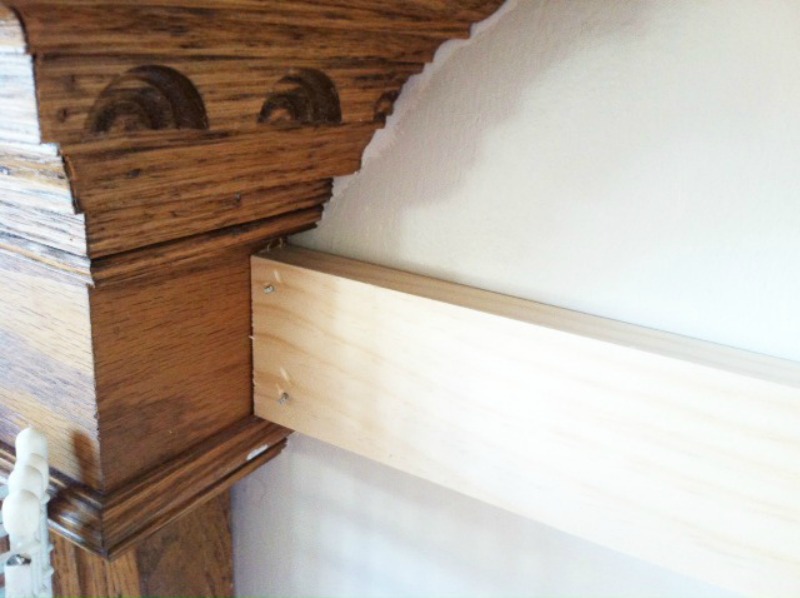
Start with the horizontal board which also acts as the
board which will hold the “ledge.”
I like to use a 4″ board.
Because you are making basic cuts, you could use
a hand saw if you did not have a handy-dandy
Miter Saw. You could even have the nice Home Store
guy cut them for you when you purchase
the boards, if you know your measurements.
I have an Air Gun which shoots in nails, but you
should be able to easily nail these in with
a hammer. I would suggest pre-drilling so the board
does not split, and also you want to nail into the
studs when possible.
Once, you have your first horizontal board in place…
you can now measure and cut your vertical boards.
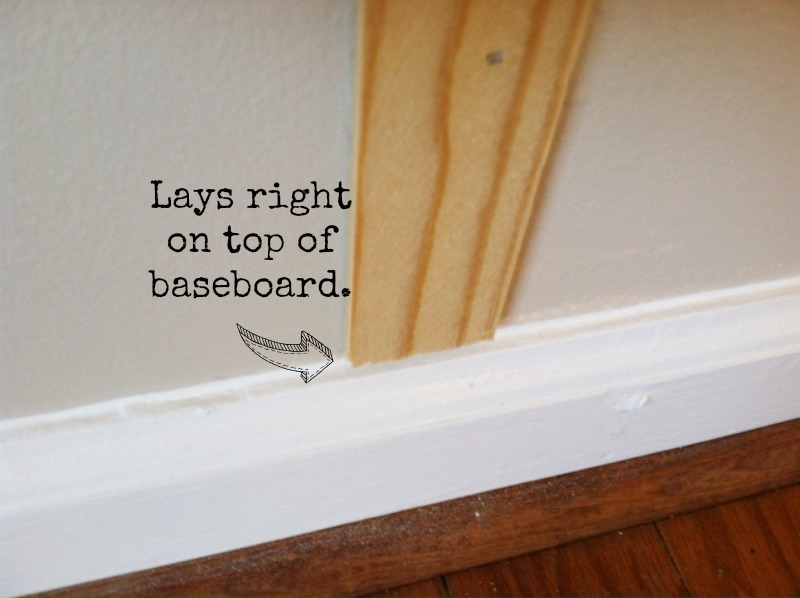
For the vertical boards, I use lattice strips.
They are exactly what they sound like.
Thin strips of unpainted wood used to repair lattice.
The best part is that they sit right on top of your baseboard,
so you do not have to even remove those.
Once your strips have been cut, simply run a bead of
Loctite Power Grab, or other adhesive, along the
back to help hold the strips in place.
You can use some painter’s tape to help hold the strips
in place if needed, once glued.
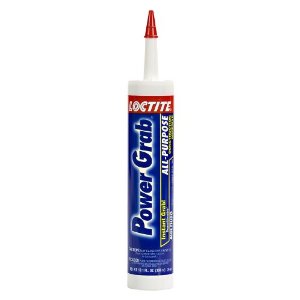
I LOVE this product, by the way.
(They are NOT paying me to this.
I just love to pass along a good product when I find it.)
Use some small trim nails to secure strips to the wall.
Don’t worry if there are gaps along the edges,
some caulk will easily fill them in.
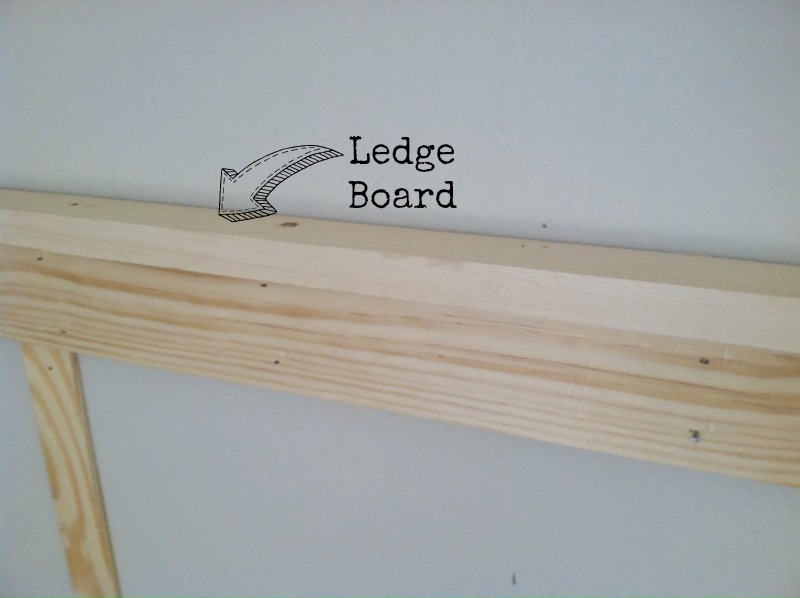
Once all the lattice strips are up…

– it’s time to cut and install the top horizontal board,
or the ledge.
I prefer to use a 2″ wide board.
*As a note, to keep the cost down, you can use
a lower grade of pine since you will be painting
them. But, just make sure you give the boards
a good sanding, if needed, prior to installing.
Again, I would suggest that you pre-drill, because
of the angle you will be nailing.
That’s it.
You may also need to use a nail set to make sure
all your nails are imbedded.
Once you have everything nailed into place,
you will need to caulk all the cracks and
nail holes and allow to dry.
*Make sure you use a paintable caulk.
When you’re done, you go from this…
to this…
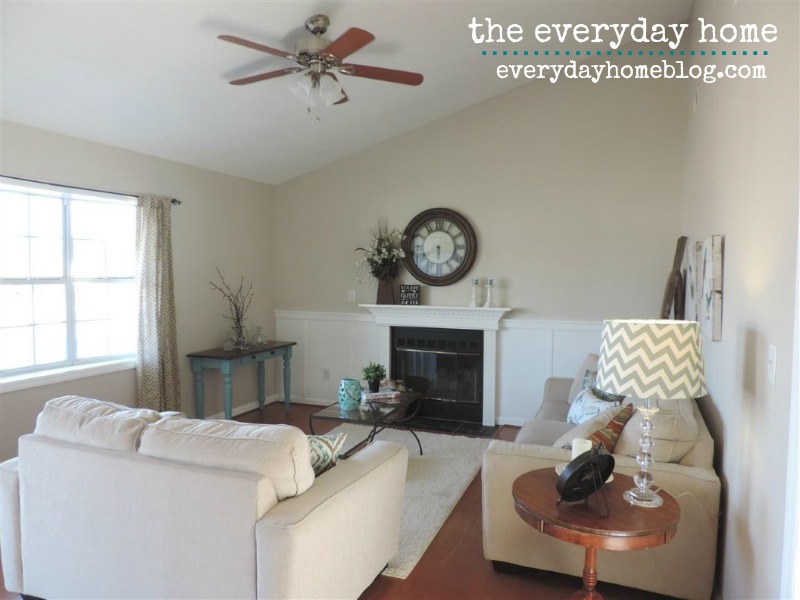
For literally about $50, I added a feature wall which
completely changed the look and feel of the room.
I do not know of any DIY project I have ever
completed, for so little money –
which allowed so much bang for the buck!

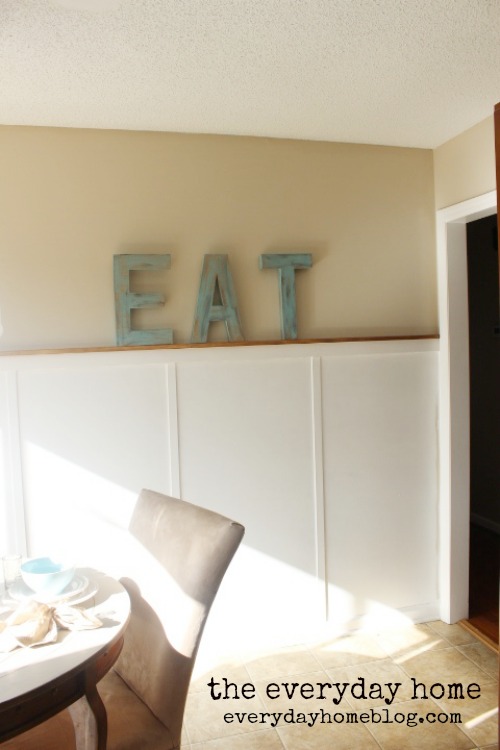
I added this same treatment to a wall
in the kitchen, as well.
But, I went a little higher, and also –
instead of painting the entire area white…
I stained the top ledge to match the cabinets.
I like it.
I think it adds so much character to a space
when there are no architectural elements.
Quick ‘n easy, affordable and
most of all…it can be completed in one day.
Win. Win. Win.
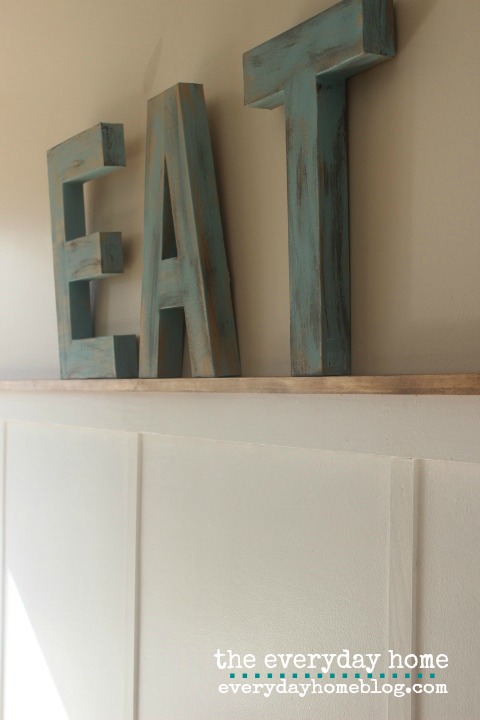
I will be sharing the how-to for the E-A-T sign
above next week. 🙂

If you liked this project and would like to
save it for future reference, please
PIN IT to your favorite Pinterest Board.
*simply hover over the images and the Pin It button will appear.
I would LOVE for you to Tweet this message…
[Tweet “Easy and Inexpensive Board ‘n Batten Wall Treatment #DIY #Decor”]
Check out some other Easy and Inexpensive
DIY Projects from our previous Flip House…
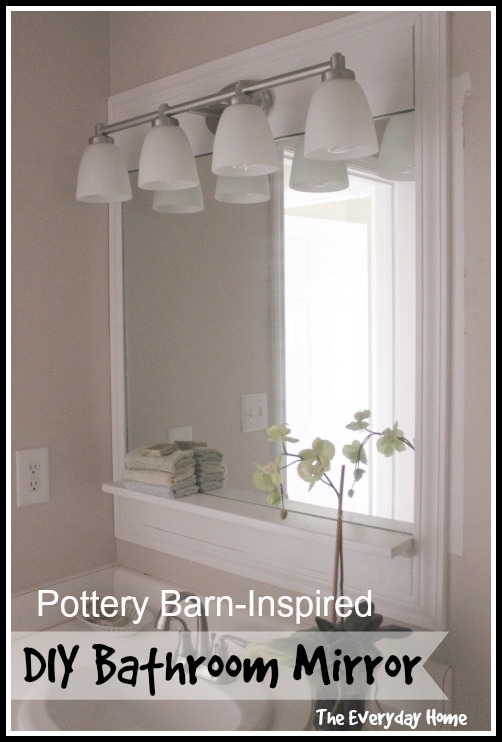
Pottery-Barn Inspired Bathroom Mirrors
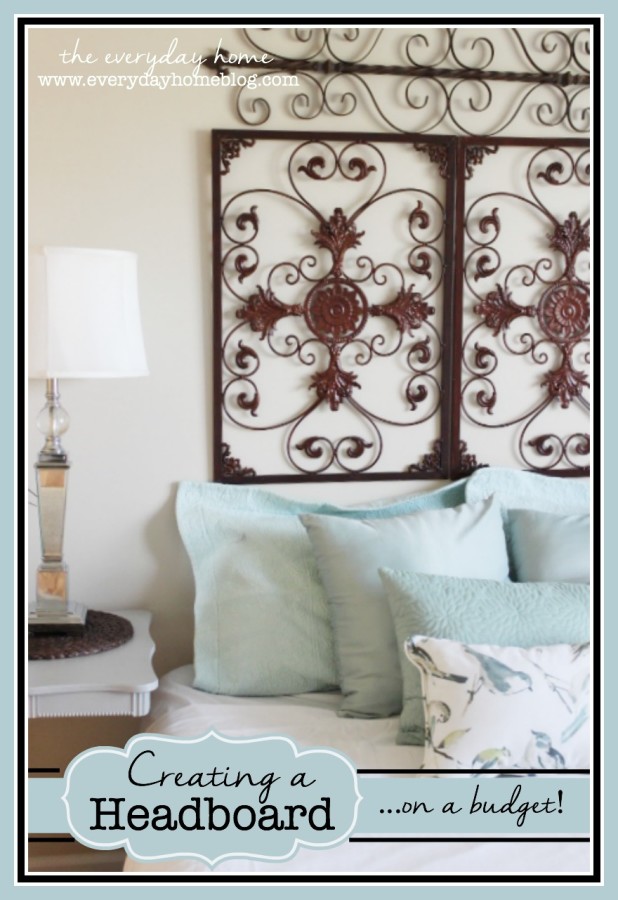
How to Create an Inexpensive Headboard
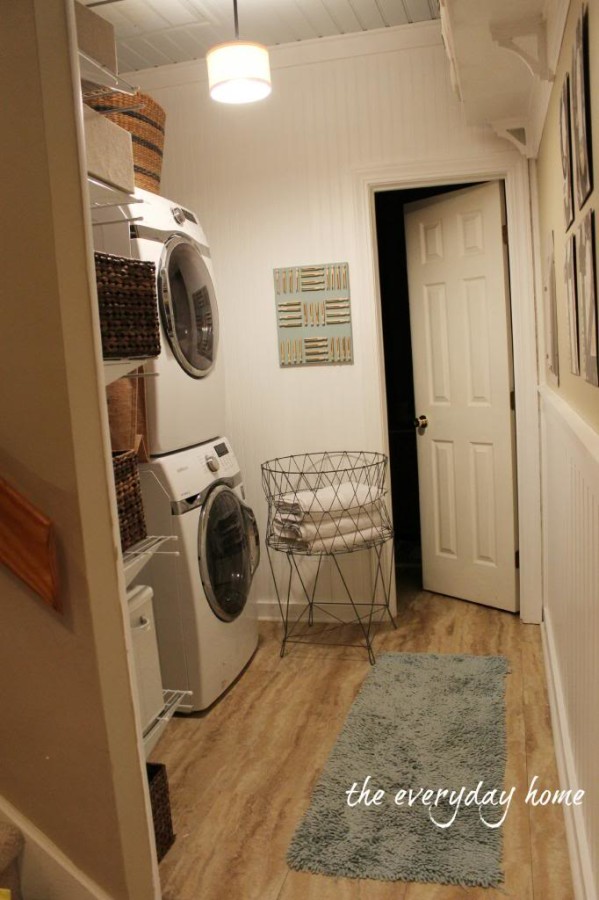
How I Cheated to Get the Look of
Expensive Mouldings in my Laundry Room
Thank you for spending a few minutes of
your day here with me at
The Everyday Home.
You can also follow along with me at:
xxoo, Barb
sharing with:
Confessions of a Plate Addict/The Scoop – Concord Cottage/Something to Talk About
Between Naps on the Porch/Metamorphous Monday Home Stories A-Z/Tutorials and Tips Tuesday
A Stroll Thru Life/Inspire Me Tuesday – My Uncommon Slice of Suburbia – Inspire Me Monday
French Country Cottage – Feathered Nest Friday – Craftberry Bush – Inspiration Friday
Tatertops and Jello – Link Party Palooza


Very nice, Barb! Amazing how much weight that one wall adds to the room. grace
View CommentThanks so much. I debated about doing the whole room but decided in the end, because it was a flip home, to keep expenses down, but also I love how it creates a focal point. Thanks for stopping by.
View CommentWow, you did such a great job! I love how simple it was, but you’re right, it completely transforms the room!! I’m definitely pinning this 🙂
View Commenthttp://www.diyjustcuz.com
I would love to know the paint color you used on the kitchen wall above the board & batten wall. I am remodeling a small Towhnouse as a guest house and I have been struggling with the paint colors. I am using some bead board features and since I saw how yo did this feature wall I think I’ll incorporate it into the sunroom wall paired with a beaded ceiling. I would really appreciate it if you could tell me that paint color, Im using all my paint budget buying the wrong paints!
View Comment