Hi my Everyday Friends.
Have you noticed I’ve been a bit absent? 🙁
I’m sorry its been a while since I posted. Unfortunately, I am severely
anemic. Again.
so I’ve basically been flat of my bed – rotating between the bed to the couch. 🙂
I have been getting some Iron treatments and today is the first day I feel
remotely decent.
We are supposed to leave tomorrow for a camping trip with the Grands.
It should be “interesting” to say the least.
For all you folks who have felt with this your whole life or most of your life,
God bless you.
It’s tough! :-/
For the next week, I am going to share some fabulous Guest Posts by some bloggers
who so kindly
offered to help me out. I can’t wait to share their posts and projects with you.
I’ll be back soon, I promise.
Love to all!!! xxoo, Barb


Hi everyone! I’m Cathy Mini! It’s so great to meet you!
Thanks so much for letting me share one of my first, successful DIY
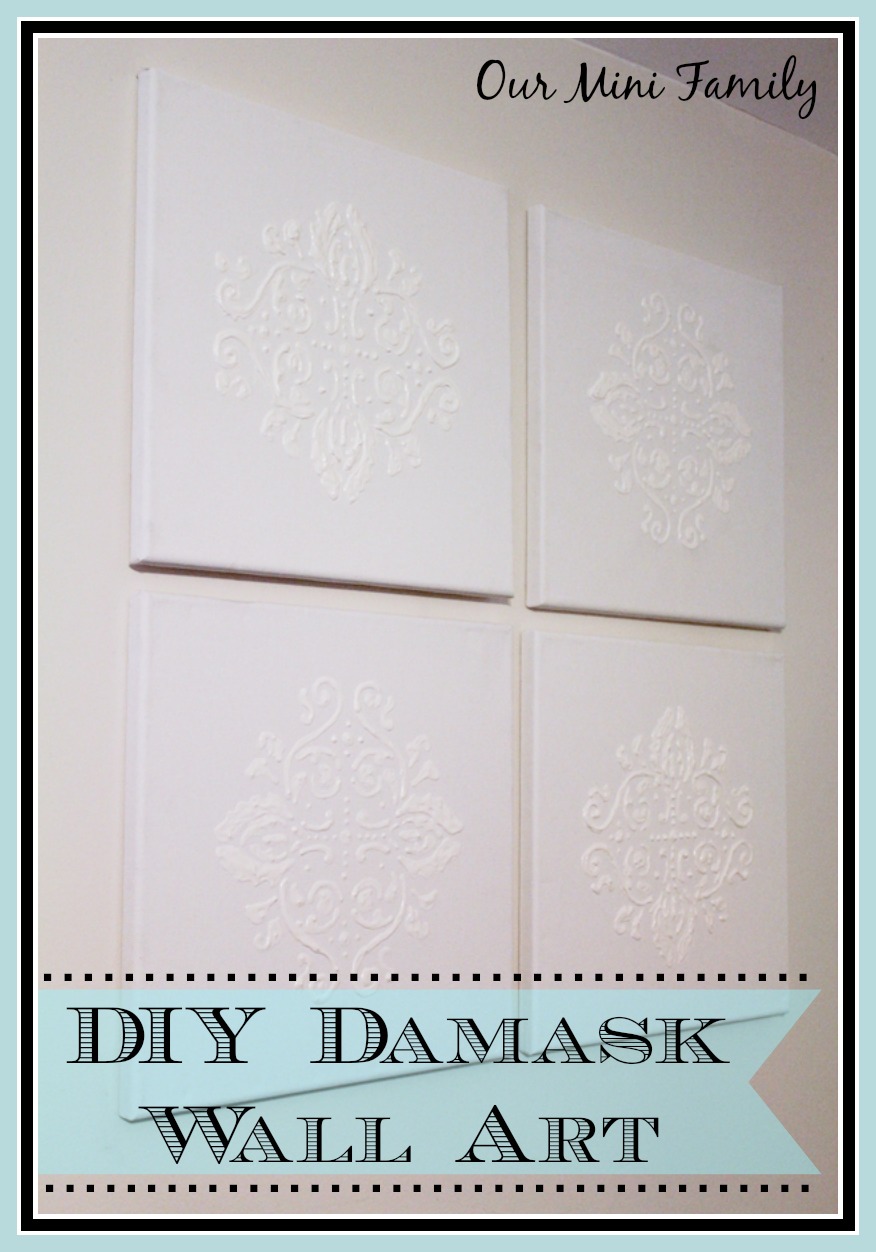
projects from my blog Our Mini Family with all of you here at The Everyday Home.
This tutorial was one of my first, and is hands down still one of my favorites.
In this guest post, I will tell you how I accomplished the look of the
finished products (see photo above). I hope you all enjoy it!

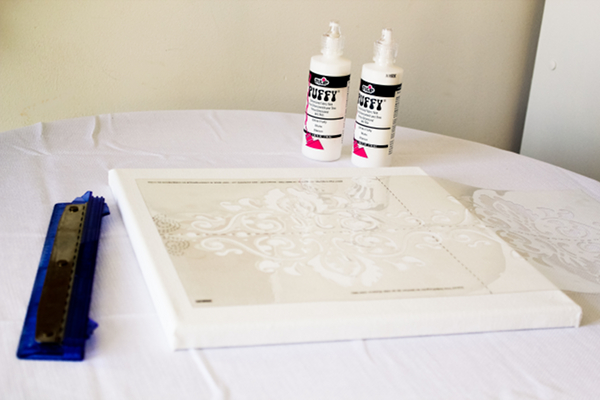
Puffy paint, among other things (like my 4 canvases, stencil, pencil, painter’s tape,
a ruler, AND a ruler! ) –
was the key to the success of how this experiment turned out.
Did I emphasis the ruler enough? Because it was super important! Haha


These first two canvases were…interesting to say the least. I thought,
for whatever reason, that putting the stencil down and THEN using the puffy paint
on top would work.
The funny discovery I made after it dried was that:
a) the puffy paint sat mostly on top of the stencil and not on the canvas!
&
b) most of the paint that did make it onto the canvas ended up acting more like glue and
made the stencil stick to the canvas!

After coming to the discovery that this was not the best way to go about the
remainder of this project,
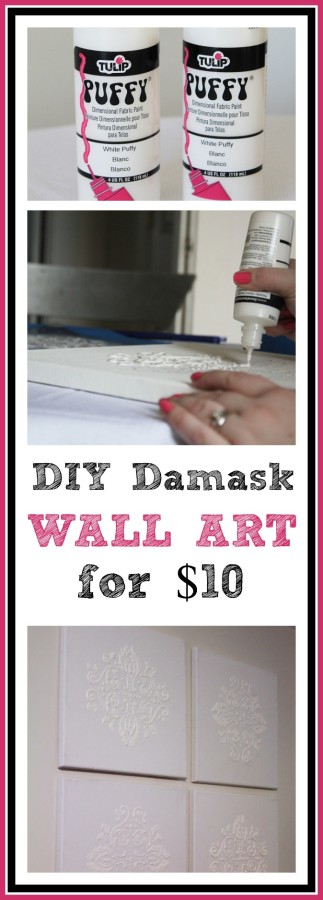
I decided to stencil the damask silhouette onto the canvas with a pencil!
It really worked out 400% better,
and if you decide to pursue this project: do NOT try it the first way I did it!
(unless of course you want a stress headache!)


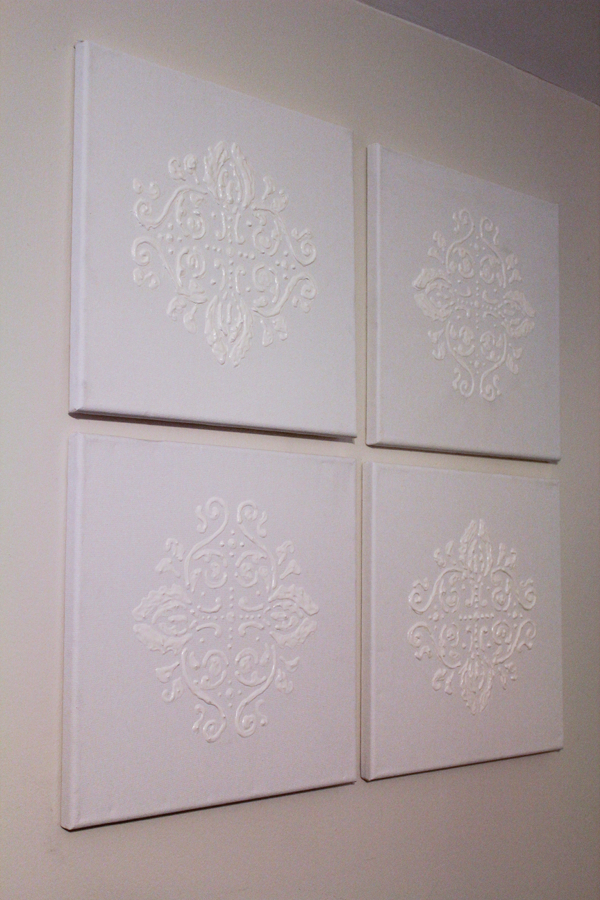

I think it turned out rather fabulously! Adam, my husband, was laughing at me
because I am a little bit mathematically challenged, and I was having
difficulty calculating where to put nails in the wall to make my grid.
In the end, about 15 minutes of grueling measurement later, my damask made it to the wall!
I paid about $10 for the canvas, and $3 for the puffy paint!
If you liked our project, be sure to like us on Facebook!
Thanks everyone! xo Cathy Mini


Thanks Cathy!
I love this art work and I appreciate that you shared it with us.
If you would like to follow Our Mini Family on Pinterest,
you can follow her HERE.
You can follow The Everyday Home HERE!
If you loved this project, please pin it to your favorite board…
Follow The Everyday Home on…
A Monthly Newsletter Coming Soon!


Here’s to feeling better Barb. ((hugs)) I know… it sucks. Been there.. daily fight for me.
View CommentHere’s t9 a better weekend.
Gee
Barb, I’m so sorry you’re feeling puny! We miss you, but we’ll wait. Here’s to feeling better!
View CommentSo sorry you are not feeling well! I have been somewhat out of commission too, so I understand how that is. Thanks for sharing the tutorial with your readers again!
View Comment