
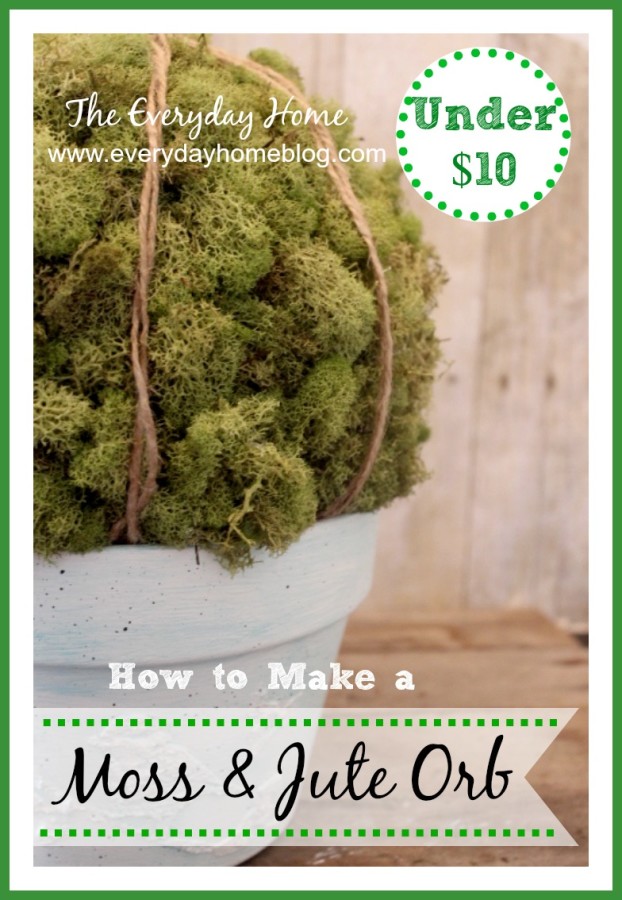
“Easy Moss & Jute Orb and an Embossed Bird Pot”
I almost titled this post “The joys of finding money in the laundry.”
I mean, is there anything that excites you more than reaching into
that drum of clean clothes and finding an equally clean dollar bill?
I call that “Two-Fer Laundry.”
Two fer the price of one…clean laundry and getting paid for
doing the laundry. Win-win!
That’s kinda how I saw this post. A “two-fer” post.
Not only am I sharing an easy and inexpensive way to
create a Moss and Jute-Covered Orb, but I am going to share
another fun project.
An Embossed Bird Pot.
Win-Win-Win.

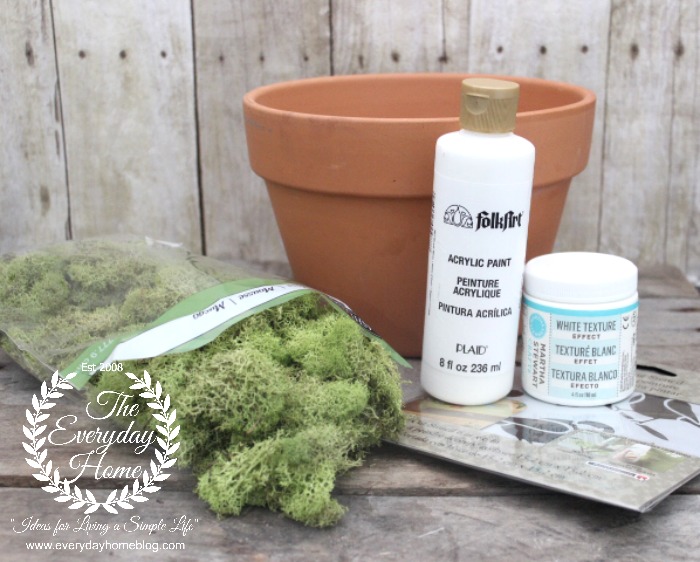
Most of the supplies can be easily purchased at any craft store.
A clay pot, some moss, craft paint, and a stencil.

If you have been following me for any length of time,
you may remember I have a secret fetish.
A moss fetish. I am growing some in my back yard
and been having some very good luck.
(more on that later)
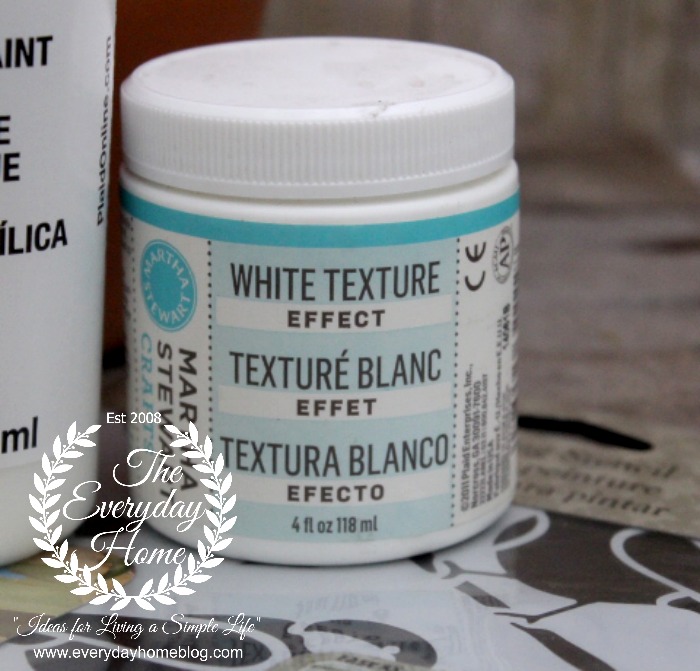
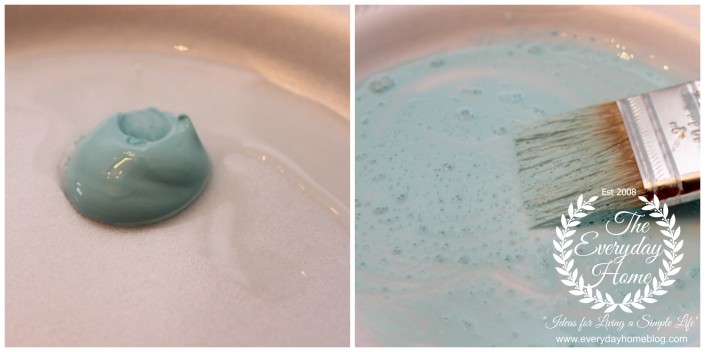
I have had this container of Martha Stewart Texture Paint since
before Christmas.
I was going to use it for some ornaments, but alas….
I ran out of crafting time.
Or was that crafting energy? 
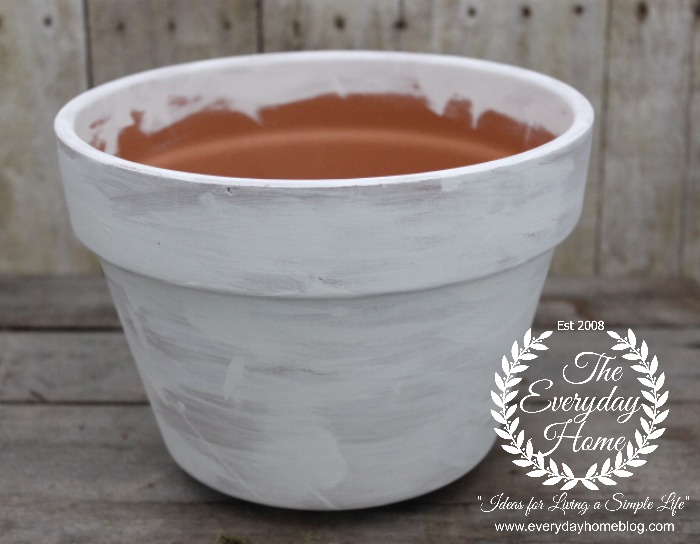
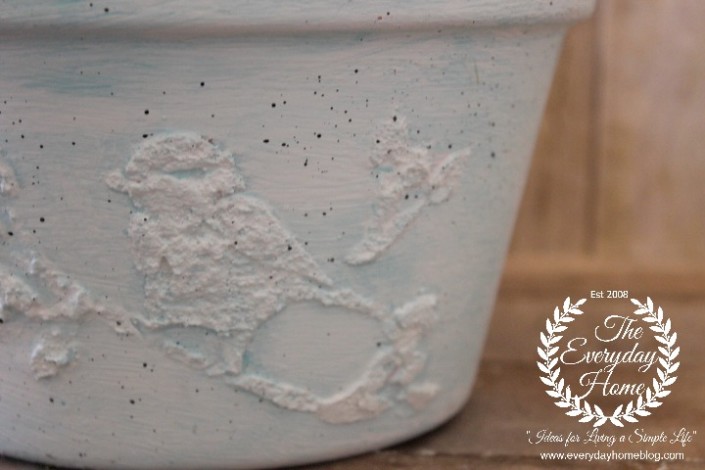
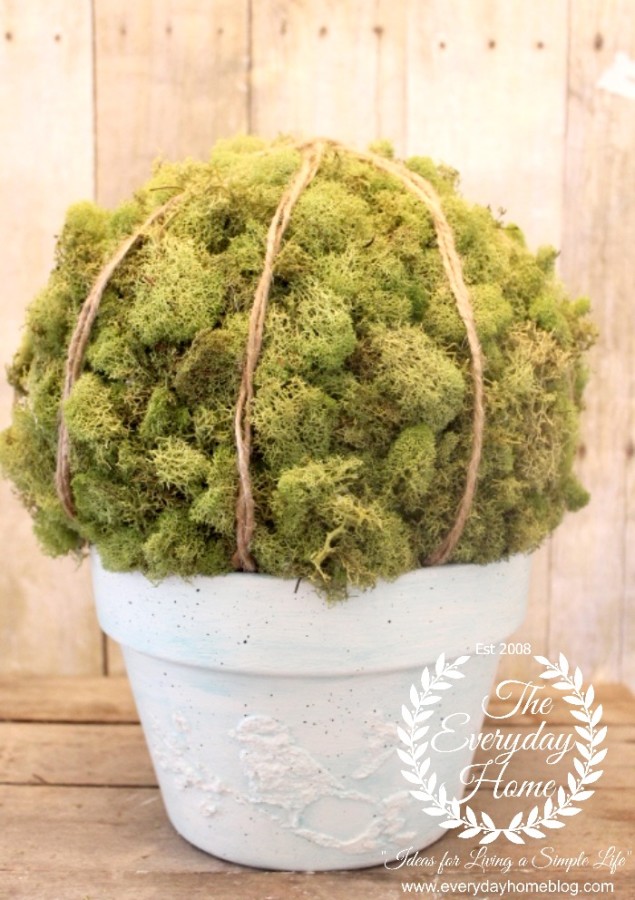
I started by simply priming the pot with basic, white craft paint.
I tried my hardest to keep the paint on the pot, but the Crafting Gods
have willed that paint shall splatter on and about my body throughout
the duration of the painting process. The Crafting Gods have spoken.
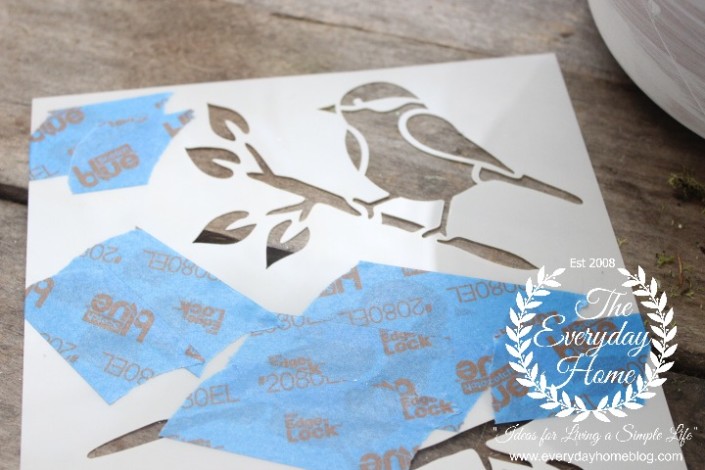
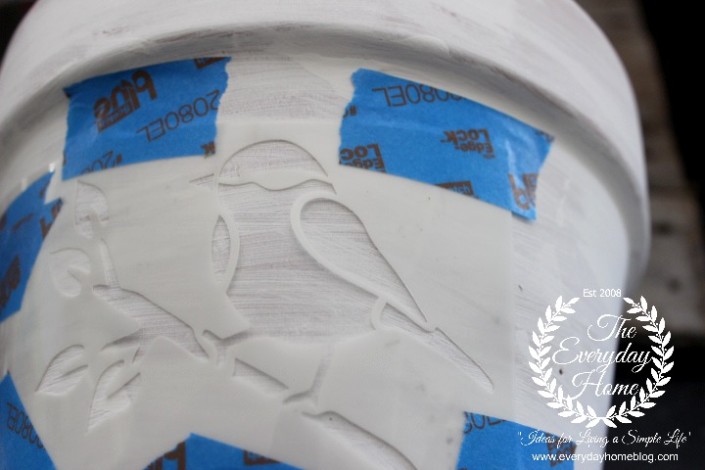
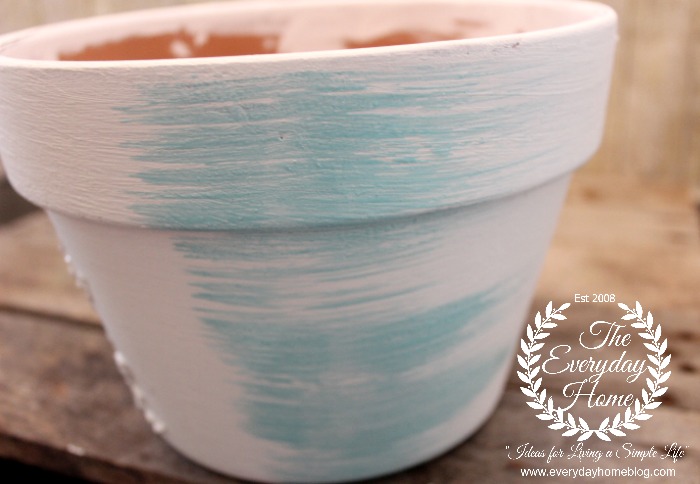
I used this cute little bird stencil. Using some painters tape,
I taped off the areas I did not want to use.
Then, using more tape, I applied the stencil to the pot…
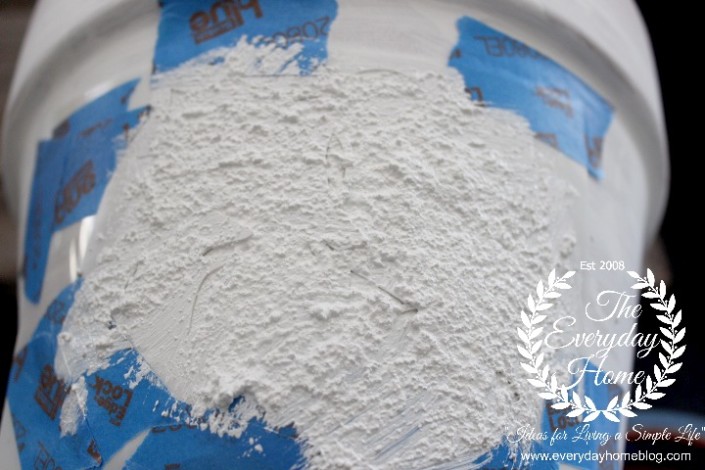
Martha sells these nifty-neat-o tools, or spatulas, that allow you to
apply the textured paint. I have some “built-in” tools.
My fingers.

I used a small, sponge brush to apply the textured paint,
but ended up using my fingers to flatten and smooth it out.
After the stencil design was covered adequately – I pulled away the
stencil and this is what I had.
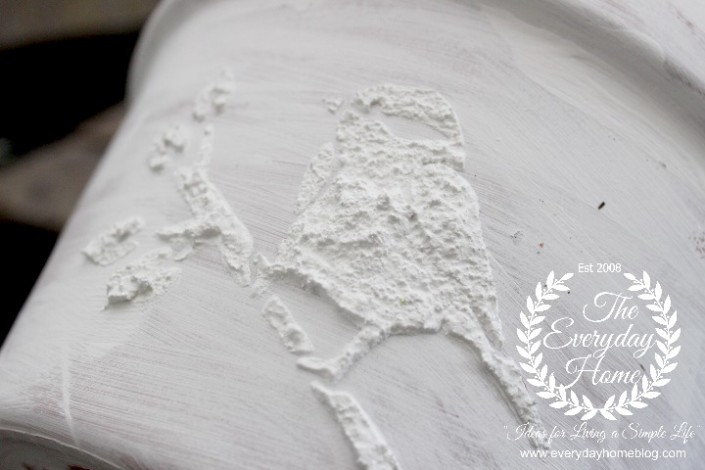
It’s very quick drying, so once this design had dried and hardened,
I taped off smaller sections of the stencil and added more
branches and leaves.
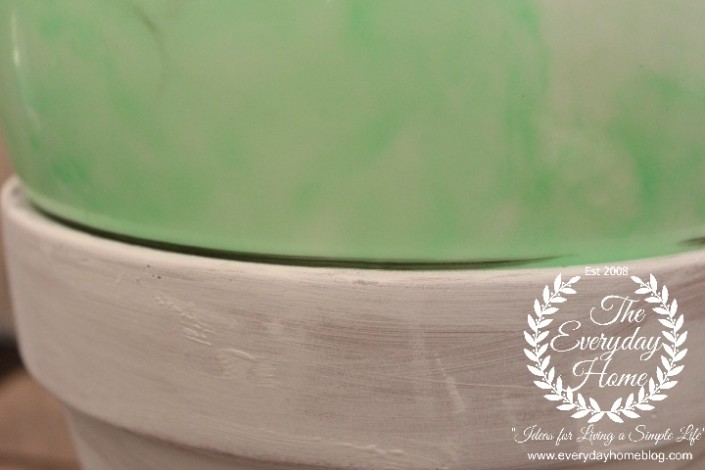
Then, I added another layer of white paint all over.
I did not want a solid white pot. This will be placed in my foyer
with my cathedral blue mirror…
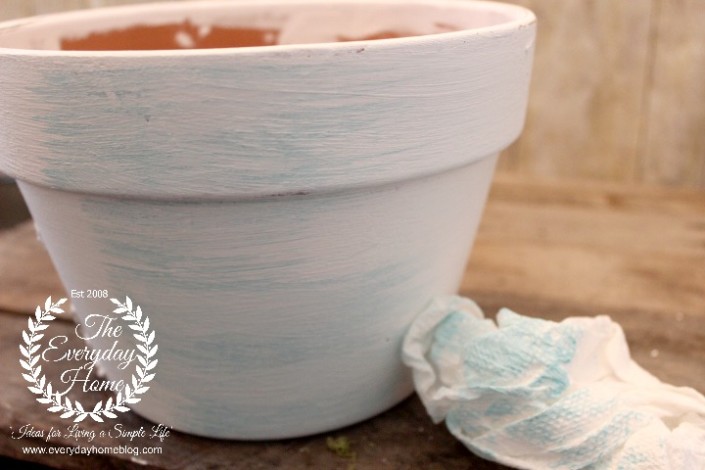
So, I watered down some blue craft paint…
– applied some dry brush strokes…
… and immediately wiped and blotted with a damp paper towel
until I got the look and color tone I wanted.
Finally, I mixed some black paint, very loosely, with water…
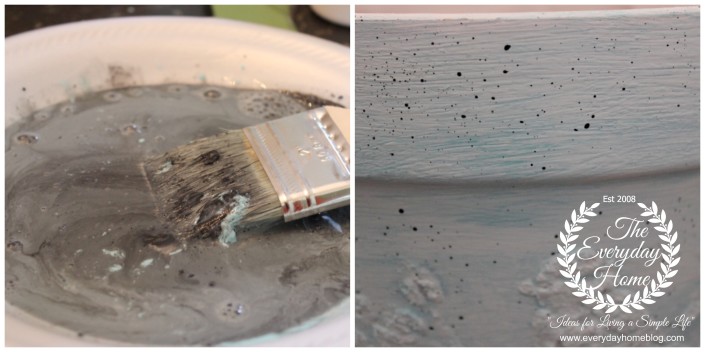
…. and using the bristle brush tips, I flicked the black paint onto the pot to
add some black specs. I thought the
final result kinda resembled some blue-speckled bird’s eggs.
Once I was happy with my pot, it was time to get busy making
the Moss & Jute Orb.
Have you priced these babies lately?

#StickerShock
More importantly, have you priced large styrofoam balls
to make these?
#DoubeStickerShock
I knew there had to be a cheaper way.
Here is what I used…
Can you tell what it is?
Any guesses?
What was that? In the back… yes, you!
What did you say?

Did I hear a $1 Dollar Tree Rubber Kid’s Ball?
Winner, Winner Chicken Dinner!
It’s round. It’s cheap. It’s perfect!
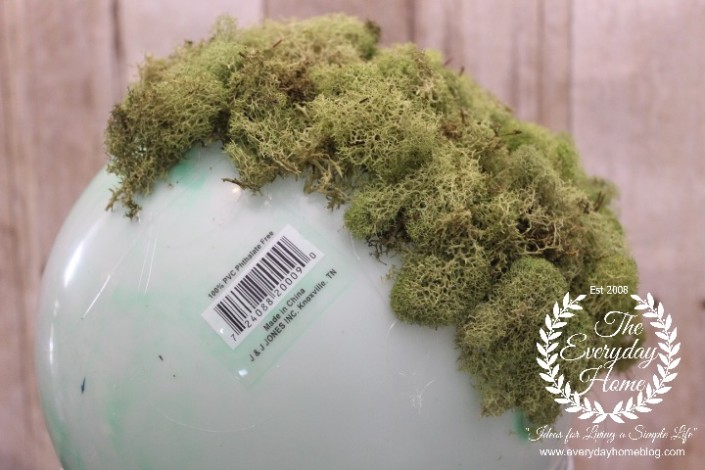
Using about a bag and a half of reindeer moss and a low-temp
glue gun… I “mossed the ball” until it was covered.
I did not add moss to the area below the rim of the pot.
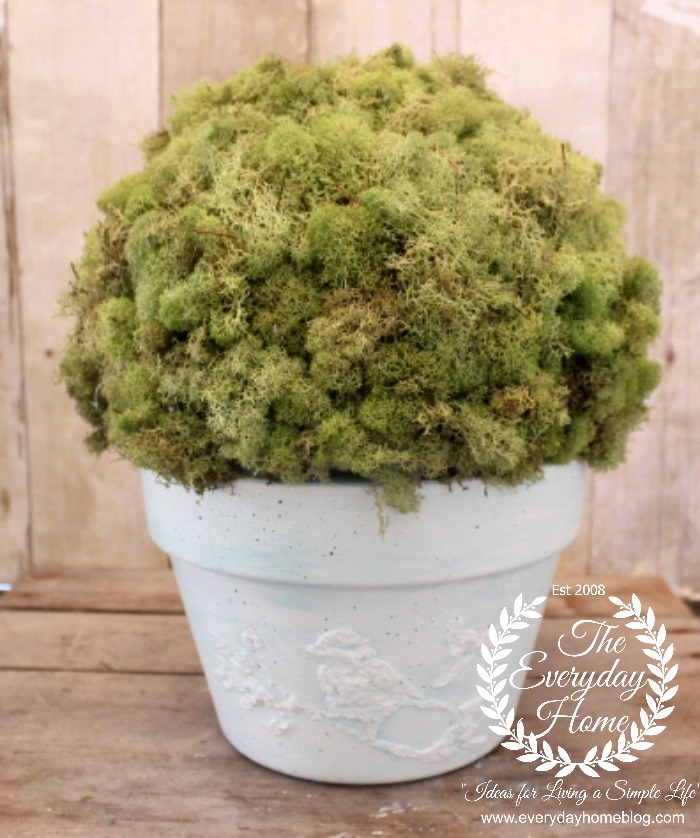
Finally, I had a Moss-Covered Plastic Ball Orb. 
But, I wasn’t through.
No, siree.
It’s the Olympics, don’tcha know – and I wanted to go for the gold.
I had my eye on that podium.
So, I added some twisted jute strips.
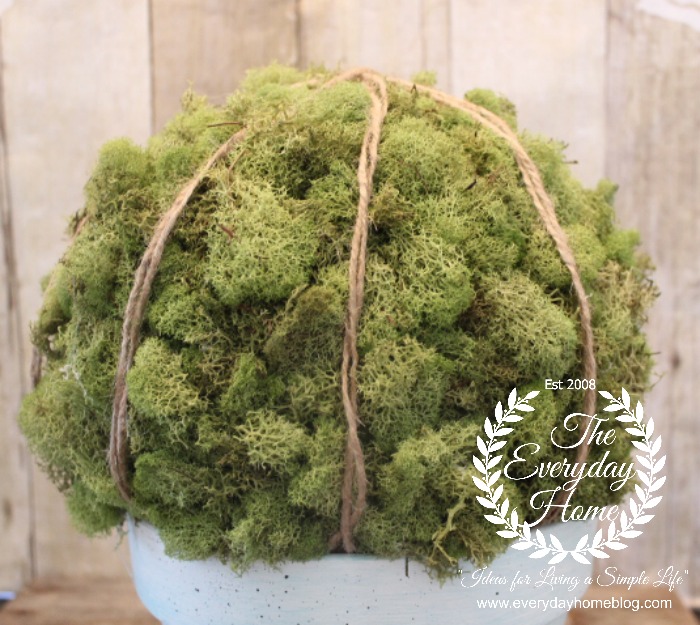
I simply glued the jute to the ball under the line of moss.
It took this Moss-Covered Orb from a Bronze project straight to the Gold.
(…or in my case, its like finding a $20 bill in the dryer)
Score!

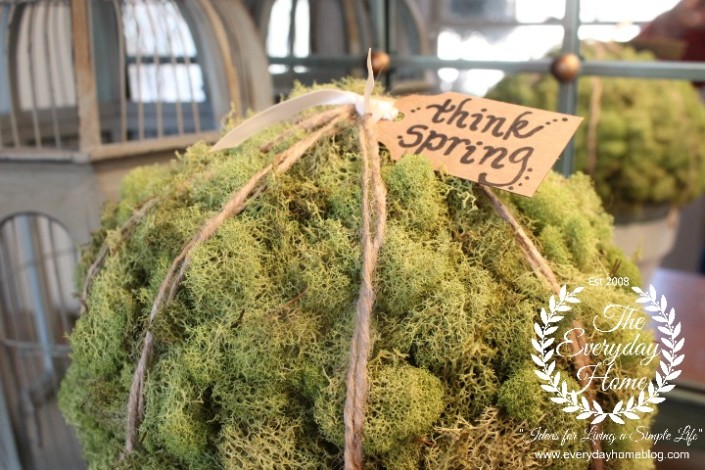
I decided to add a little brown paper tag.
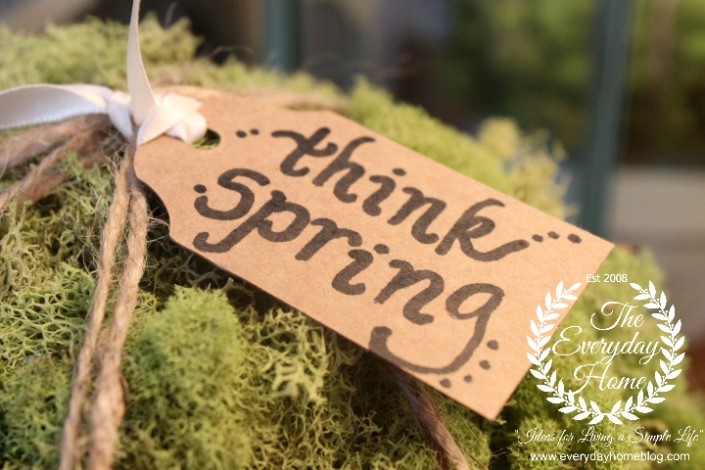
The perfect finishing touch, don’t you think?
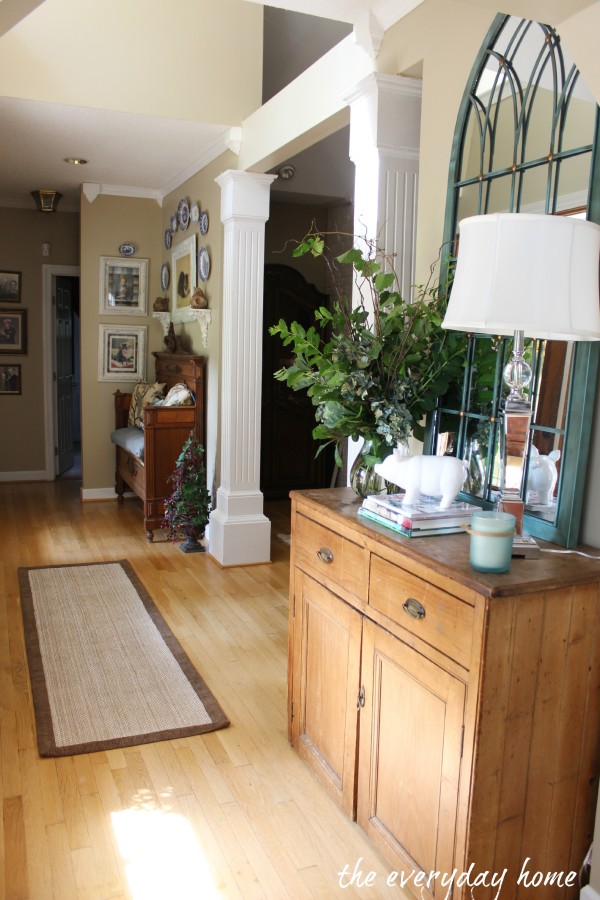
Here is a little glimpse of it on my foyer chest. I will share
more next week.
It makes me #happy.
Speaking of happy. I have joined with several other bloggers
throughout Bloggyland.
If you would like to see more Springtime projects, just look for the
hashtag #thinkspring.

So, that is my Easy & Inexpensive Embossed Bird Pot
and Moss & Jute Orb.
I would love if you would pin these projects to your favorite
Pinterest Boards…
This past Sunday, I spent a wonderful day at
@Michaels sharing some Pinterest-pinnable crafts with
some lovely crafters who stopped by. It was part of the
Hometalk/Michael’s Party. #mpinterestparty
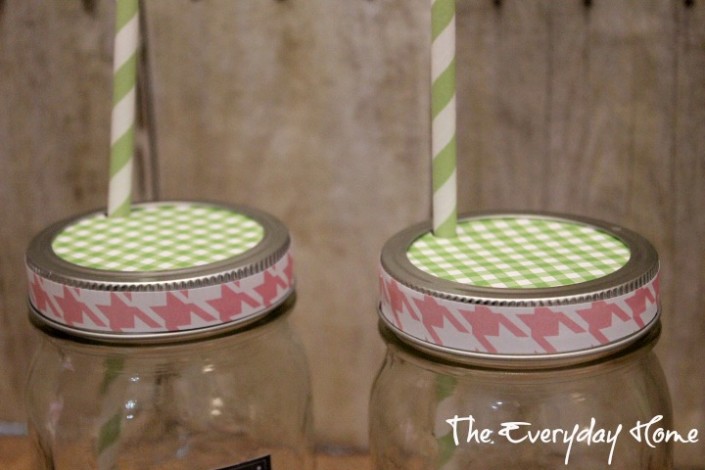
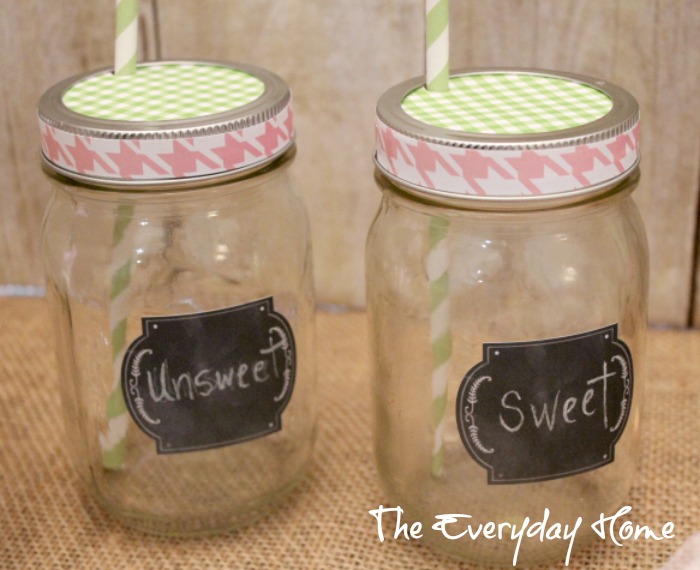
I also shared some “Easy Ideas for a Baby or Bridal Shower“
such as these cute Mason Jar Glasses.
– and this cute Cupcake Banner…

I took lots and lots of pics.
I told the crafters to come by this week and I would be sharing the
pics from our special and oh-so-fun day.

I accidentally deleted them.
It was silly and to be honest… I could not believe I had done it.
But – please let me say what an absolute blast I had and I so enjoyed
meeting every single one of you. I can’t wait to do it again soon!
Join me on Friday for Farmhouse Friday: Bathrooms.
Wishing you find lots of riches on your laundry and your life…
Love to you…
Sharing With:
Delivered by FeedBurner


I love the speckled pot the most!!! Of course I love moss too so it is PERFECT!
View CommentThanks. It would be pretty even without the embossing huh? 🙂 I may be making more speckled pots this season. Thanks for stopping by. xxoo, Barb
View CommentHI Barb! Oh, honey, you’re the smartest one! I love this and would have never thought of doing this! I may have to try my most dainty fingers at this! 😉 You rock, Barb!
View CommentBe a sweetie,
Shelia 😉
A ball – what a great idea! I’ve seen someone use a big wad of newspaper taped together and that worked too. Your way is much easier. It all came together so well. It’s really pretty and perfect for spring.
View CommentThis turned out so cute, Barb! I can’t get over how expensive styrofoam shapes are too. So clever to use a plastic ball from the dollar store! Your tutorial was really good and easy to understand. Great job!
View CommentI really like this moss orb!
View CommentIt’s been a warm winter over here, and our garden is covered in moss. I have been thinking about making something with it, but haven’t known what – but now I do, thanks 🙂
I love that orb! What a great idea to use a ball!
View CommentUsing the ball is brilliant! It all looks great, love the tag, I think you deserve the gold! and no, I can’t believe how $$ styrofoam is!
View CommentOMG!! The toy ball was ingenious!! Yes!, styrofoam is expensive!
View CommentLovely …just lovely tutorial. What a grand idea that looks so wonderful. We shared your tutorial on our women’s community. Thanks for spreading the love!
View CommentCute, cute, cute. I haven’t seen that textured paint yet. Gotta try me some of it.
And are you sure it’s only moss you’re growing in your backyard. 🙂 JK.
View CommentWhat a brilliant thing to use for the orb! Just pinned your project and may even make something like this. I’m on a moss kick right now. lol The pot is beautiful, by the way!
View CommentI LOVE this Barb!! So glad you circled me! Love your blog, and I can’t wait to try this out! xo Jen
View Comment