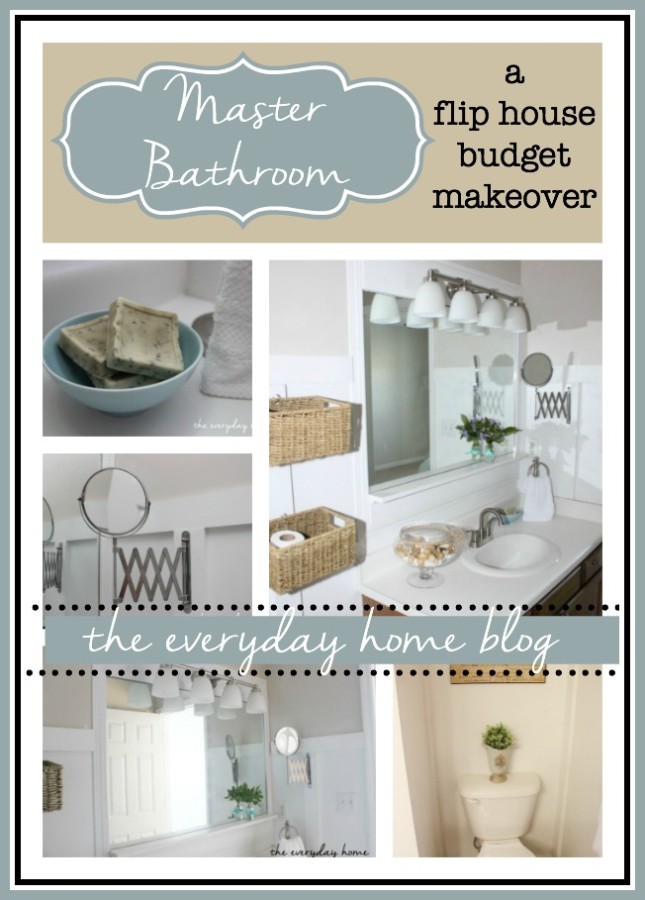
“Master Bathroom Makeover”…
on a Budget!
I think with any home renovation project, you look back with a few doubts and
a few more “I should have’s.”
I should have used a different color…
I should not have added that extra piece of trim…
I should not have started this project to begin with.
😀
The above doubts and more were constantly running through my head while
my son and I were working on the #fliphouse.
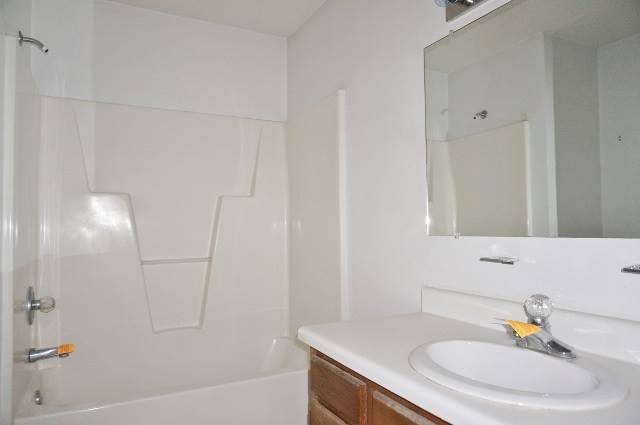
{ The Before }
We worked on this project like a well-oiled machine.
Puttering along, room by room and project by project.
Never arguing or bickering and always agreeing on every detail.
Hahahahaha….
yea, those statements made me laugh, too.
😀
We fought and argued and bickered like two kids at a candy store
fighting over the last bag of JuJu Beans.
But, one thing is true.
Never once did we leave the house still mad at each other.
As the month-long project – we figured out what buttons we needed to NOT push on each other.
By the time we got to the bathrooms, we were 75% done.
Which also meant we had used about 75% of the budget. 🙂
This is when we worked best together.
Coming up with ideas that would look like we had spent a fortune, when in fact we
had used leftover boards and moldings – and a whole lot of creative ingenuity.
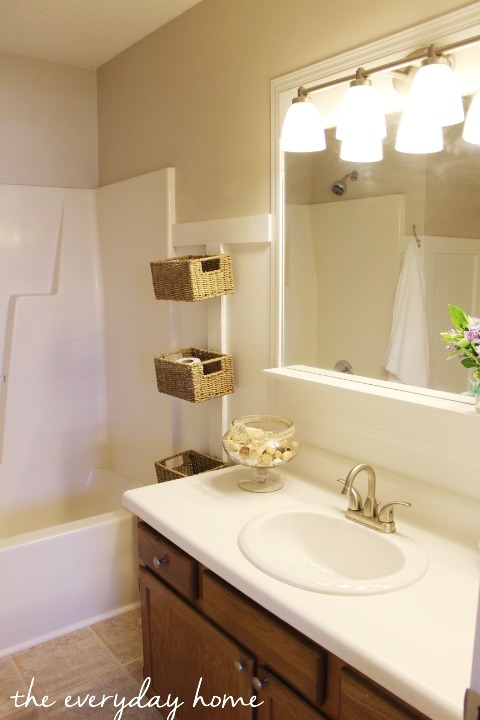
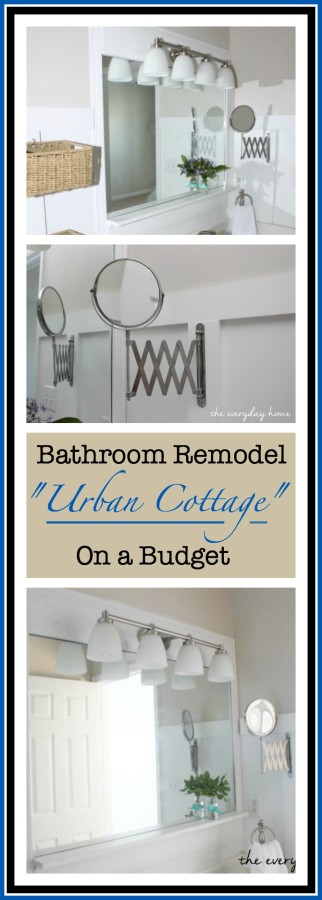
I knew I wanted to continue the same style of “Urban Cottage” as we had put in
the Guest Bath. You can see that room HERE.
Rummaging through our scrap lumber and molding pile, we only had a few 1×4’s leftover.
Perfect!
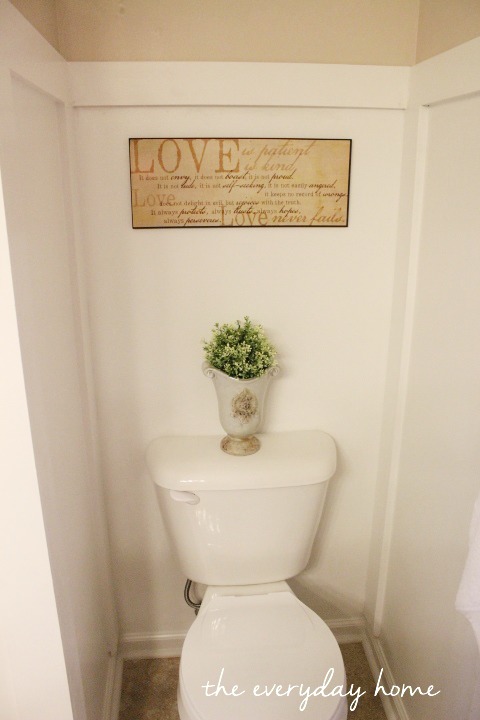
I used the 1×4’s as Board and Batten application on the walls, at about a 3/4-wall height.
Because both baths were smaller, I wanted to take advantage of a lighter and brighter decor
to give the appearance of a larger space.
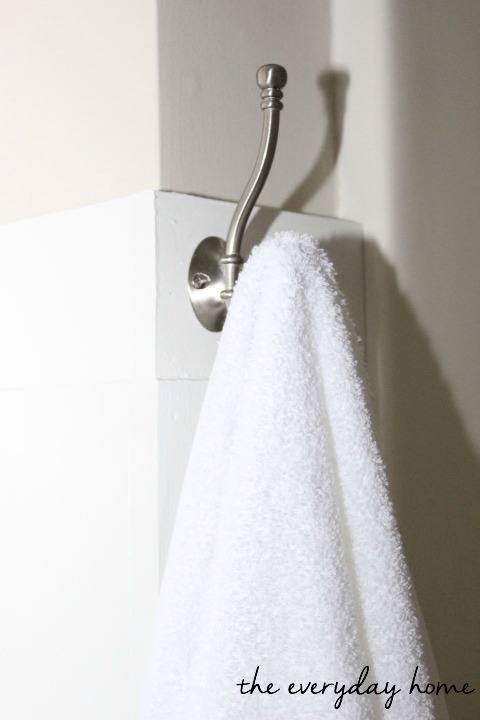
Instead of traditional towel bars, I used silver hooks.
Let’s face it, it’s a whole lot easier to drape a towel on a hook than to fold it over a bar isn’t it?
🙂
The one thing which we “may” have bickered a bit about are the bathroom mirrors.
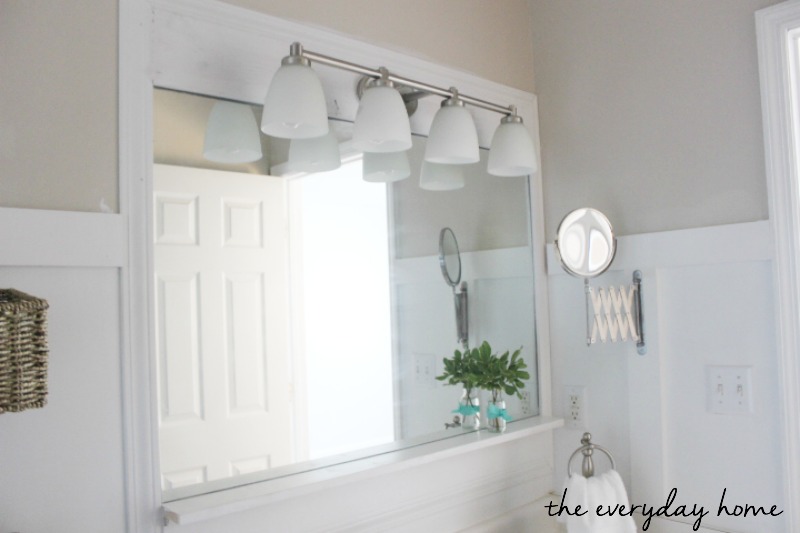
I won’t lie. This project started out as quite a headache, but I adore the way it turned out in the end.
I had a Pottery-Barn inspiration in mind, and I think we achieved just that.
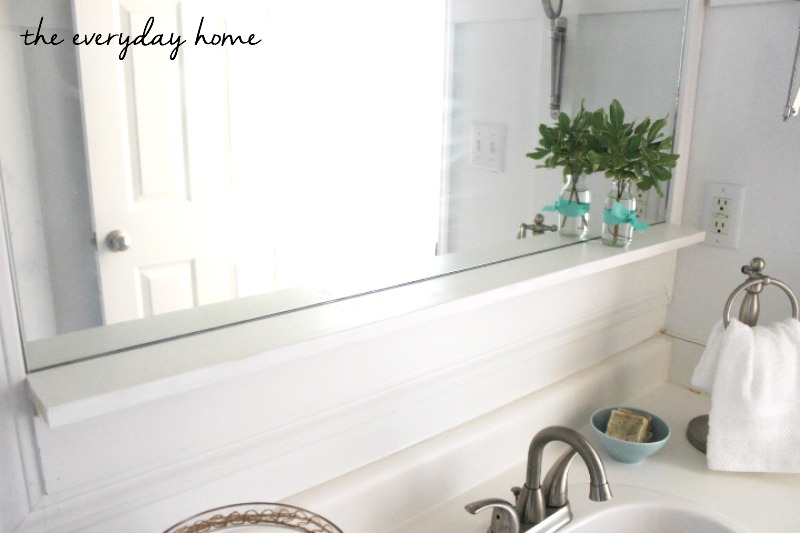
{ I love the little shelf we added. }
To see how we created this “PB-Inspired Mirror” you can go HERE.
After the overall foundation of the bathroom project was completed, it was just a matter
of adding a few niceties. Staging a flip house calls for a little creativity and a whole
lot of control. You simply can’t go overboard on the decor.
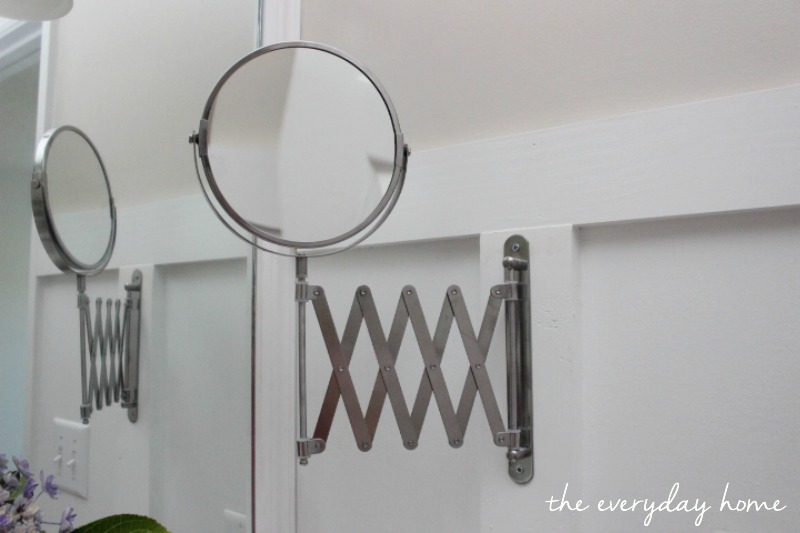
I added a pull-out make-up mirror. I found these for $5 at IKEA on a recent trip
with my sweet friend Suzy at Worthing Court.
(Yea, I may have bought more than one.) 🙂
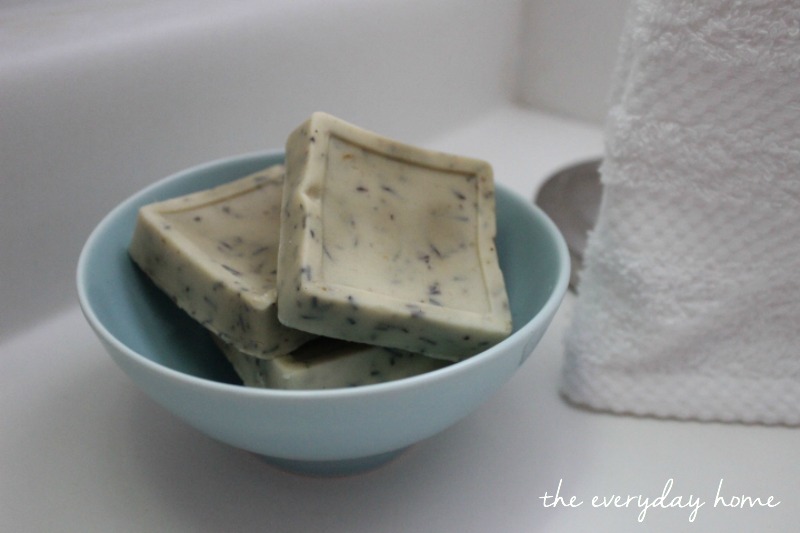
… a simple bowl of homemade soaps.
I also added a glass bowl of beach shells and blue beach glass. And white fluffy towels.
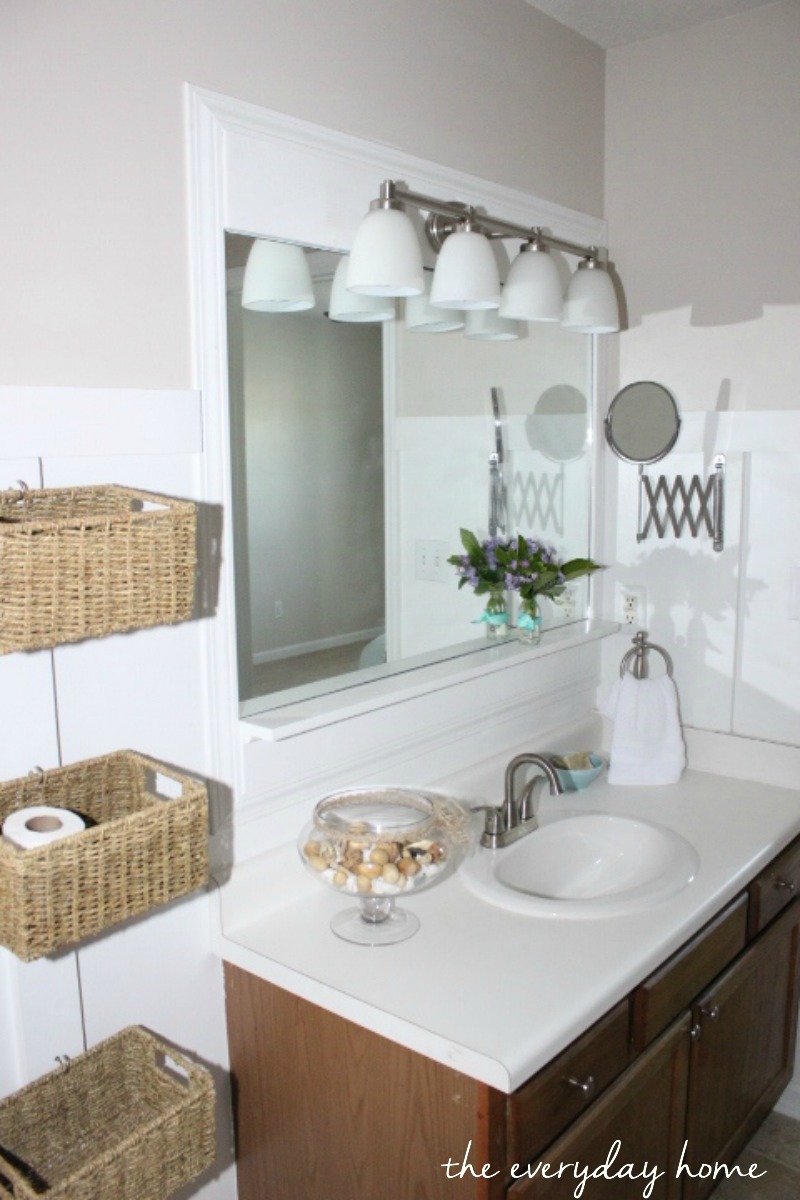
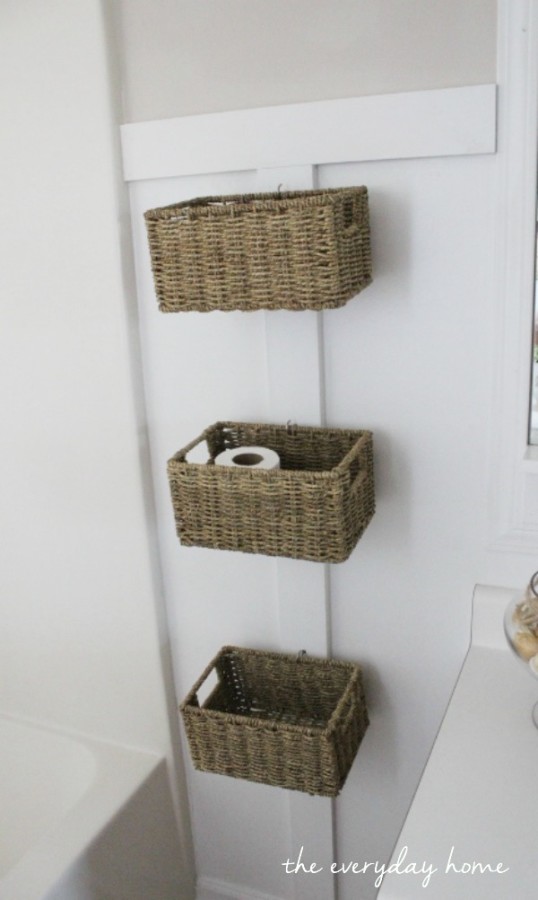
One of my favorite features is the stack of three storage baskets I added
between the vanity and the tub.
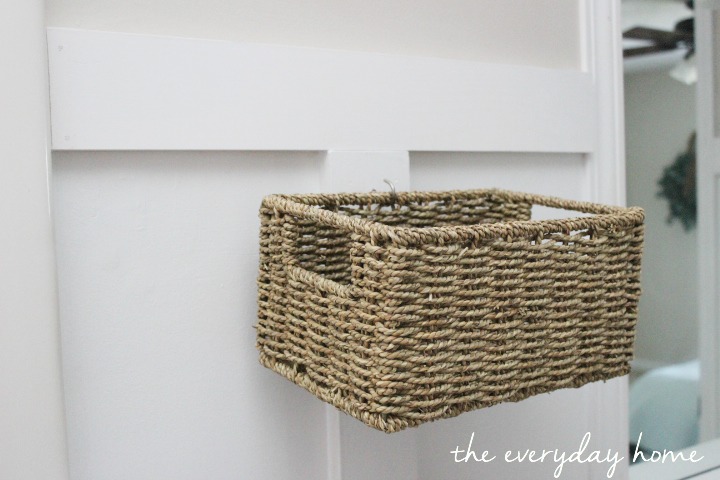
Simple silver cup hooks hold them in place.
I won’t tell a fib. My son and I acted like a normal Mother-Son at times.
It was dirty. It was hot. It was long hours.
But, the BEST part of this whole project was a few days after we were done and the house was
finally cleaned and staged and on the market…
he sent me a text late at night that said –
“I just wanted to say I know we argued sometimes but I really enjoyed working with you and I hope
we can do another flip house together. Love you Mom.”
I know without a doubt that THAT was the best reward this project gave us.
Working and being together!
Budget for the Master Bath & Materials List:
1) Laminate Flooring: $120
2) Paint: Benjamin Moore Elmira White $28
3) Light Fixture: $79 Lowe’s
4) Knobs: $10.00 Lowe’s
5) Silver Hooks: Lowe’s $2.49/ea
6) Baskets: Lowe’s $7/ea
7) Pull-Out Mirror: IKEA $5

If you missed any of the #fliphouse projects or posts, you can see them all here.
Creating a Headboard on a Budget
I would love for you to follow me on Pinterest…
The Everyday Home Pinterest Board
If you loved this project, I would love for you to share…
{Sharing With Some or All of these Great Blogs and Parties}
Confessions of a Plate Addict – The Scoop A Stroll Thru Life – Inspire Me Tuesday
Stories from A-Z – Tutorials and Tips Coastal Charm – Show and Share Party
My Uncommon Slice of Suburbia – Inspire Me Monday French Country Cottage – Feathered Nest Friday
Craftberry Bush – Inspiration Gallery My Romantic Home – Show and Tell Rattlebridge Farm – Foodie Friday
Yum Eating – The Yuck Stops Here


What a fantastic makeover on a budget! I love that you and your son got it done together. Those are fun memories you will have forever. Did it sell yet?
View CommentNo, not yet. We had two contracts which fell thru because of financing. Hoping the market picks back up soon. 🙁 Thanks for asking.
View CommentBeautiful new look! I love the baskets on the wall – great idea!!
View CommentLooks great Barb!!
View CommentLove the bathroom. We’ve been working on ours for months..the shower we had done professionally but I have been painting (and painting) like crazy. Today it is the floors.
View CommentI love the mirror you used. We have such limited space I need to organize, and that would be nice for the kids!
I think you two did an amazing job on the entire house. This bathroom looks very expensive and so cute too. Well done.
View CommentI love this bathroom….my favorite is those baskets…what a great idea! I am with you on the hooks over the towel bars…so much easier!
View CommentI love how you framed out the mirror and the little shelf!! Do you make your own soap? I’d love to learn how. Have a wonderful week!~~Angela
View CommentI love the shelf below the mirror – it’s such a great idea to get the clutter off the basin counter. I also liked the touch of the homemade soaps. So pretty. I need to ask though – what on earth is a fliphouse?
View CommentLOL, a flip house is a property we bought in foreclosure, fixed it up and put it right back on the market for sale. We “flipped” it from a foreclosure to a “For sale.” 🙂
View CommentAwesome makeover! I love the mirror, and the shelf is definitely the perfect touch!
View CommentBarb,
The bathroom makeover looks great and thanks so much for sharing it at my party. Love how you hung the baskets. You will be featured at my party on Monday:)
Blessings,
View CommentLinda
Beautiful bathroom reno! Absolutely love the touches you put in this space..especially those baskets! What a great detail…I have a master bath reno we are probably getting to this fall and I may steal that idea : )
Deb
View Comment@Seeking Lavender Lane
That’s a wonderful renovation. I loved the trim around the mirror and the sleek slab below it where you kept you potted plant.
And yes, it’s very important to agree on things when two people are working at something. You guys did a fab job!
-Tanya
View Commenthttp://tanyaanurag.blogspot.com/